Prerequisite
Complete Exercise 3 before starting this exercise. Your HDI container must be deployed.
Exercise 4 - Create a User Interface with CAP (SAP HANA Cloud)
In this exercise you will use the SAP Fiori tools wizard in SAP Business Application Studio (BAS) to generate an SAPUI5 Fiori Elements List Report application on top of the CAP OData service you built in Exercise 3. You will also add and configure an Application Router, which becomes the front door for the entire application.
Background
What Fiori Elements generates for you
Fiori Elements is a framework of ready-made page templates — List Report, Object Page, Analytical List Page, and others — that render entirely from OData V4 metadata and CDS UI annotations. You do not write view controllers or UI bindings by hand; instead, you annotate your CDS model and the framework generates the correct UI at runtime.
The Fiori tools wizard in BAS introspects your running CAP service, reads its $metadata document, and generates three files for you:
| File | Purpose |
|---|---|
app/interaction_items/webapp/manifest.json | SAPUI5 app descriptor: routes, data sources, libraries |
app/interaction_items/annotations.cds | CDS UI annotations that control columns, fields, and facets |
app/interaction_items/webapp/index.html | Entry point for local preview |
The annotations file is where the UI is "configured" rather than coded. For example, the UI.LineItem annotation in app/interaction_items/annotations.cds defines which columns appear in the list table:
annotate service.Interactions_Header with @(
    UI.LineItem: [
        { $Type: 'UI.DataField', Label: 'Partner', Value: partner },
        { $Type: 'UI.DataField', Label: 'Country',  Value: country.name }
    ]
);
Changing the list of DataField entries changes the table columns — no JavaScript required.
How manifest.json wires the UI to the CAP service
manifest.json is the SAPUI5 application descriptor. The key section is sap.app.dataSources:
"dataSources": {
  "mainService": {
    "uri": "/odata/v4/catalog/",
    "type": "OData",
    "settings": { "odataVersion": "4.0" }
  }
}
This tells the app to call /odata/v4/catalog/ for all data. The three routing targets (Interactions_HeaderList, Interactions_HeaderObjectPage, Interactions_ItemsObjectPage) map to sap.fe.templates.ListReport and sap.fe.templates.ObjectPage — these are the Fiori Elements page templates from the sap.fe.templates library.
What the Application Router does
The Application Router (@sap/approuter) is a Node.js reverse proxy that sits in front of both the SAPUI5 app and the CAP backend. It serves as the single entry point for the browser, handling:
- Static file serving — serves the SAPUI5 app from
app/router/(or a CDN in production) - Request routing — forwards API calls matching
^/(.*)$to the backend destinationsrv-api - Authentication — enforces XSUAA login before allowing access to protected routes
- CSRF protection — automatically adds CSRF token validation on state-changing requests
The routing rules live in app/router/xs-app.json:
{
  "authenticationMethod": "route",
  "routes": [
    { "source": "^/app/(.*)", "localDir": ".", "authenticationType": "xsuaa" },
    { "source": "^/user-api(.*)", "service": "sap-approuter-userapi" },
    { "source": "^/(.*)", "destination": "srv-api", "csrfProtection": true, "authenticationType": "xsuaa" }
  ]
}
The destination named srv-api is defined in mta.yaml — it points to the URL of the deployed CAP service. During local development, default-env.json (or cds bind) provides the equivalent environment variables so the router can find the backend.
Exercise 4.1 — Generate the Fiori Elements UI
Source
These steps are from Create a User Interface with CAP (SAP HANA Cloud) on SAP Tutorials.
Run the services
From the previous tutorial we have a
.envfile in the/dbfolder. This file contains the connection details to the SAP HANA Cloud instance and it was created when we performed the bind operation from the SAP HANA Projects view.
We can use this same configuration information from Cloud Foundry to start the CAP service layer and connect it to SAP HANA as well. Use the command
cds bind -2 MyHANAApp-dev:SharedDevKeyto tell CAP to bind to this same HANA Cloud HDI service instance that we bound to earlier in the SAP HANA Projects view.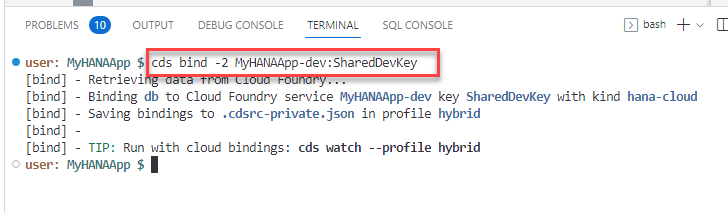
Run the command
npm installto install any Node.js dependent modules needed by the Cloud Application Programming Model.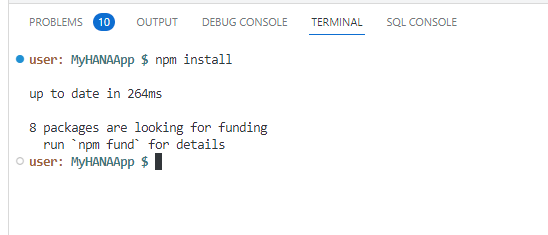
Our project is setup for real XSUAA security and we will use that later in this tutorial. But for now we want to test without configuration of the necessary authentication and authorization setup. To do so, open the package.json file in the root of your project. Change the
cds.requires.authproperty fromxsuaatomockedso we can test with mock authentication.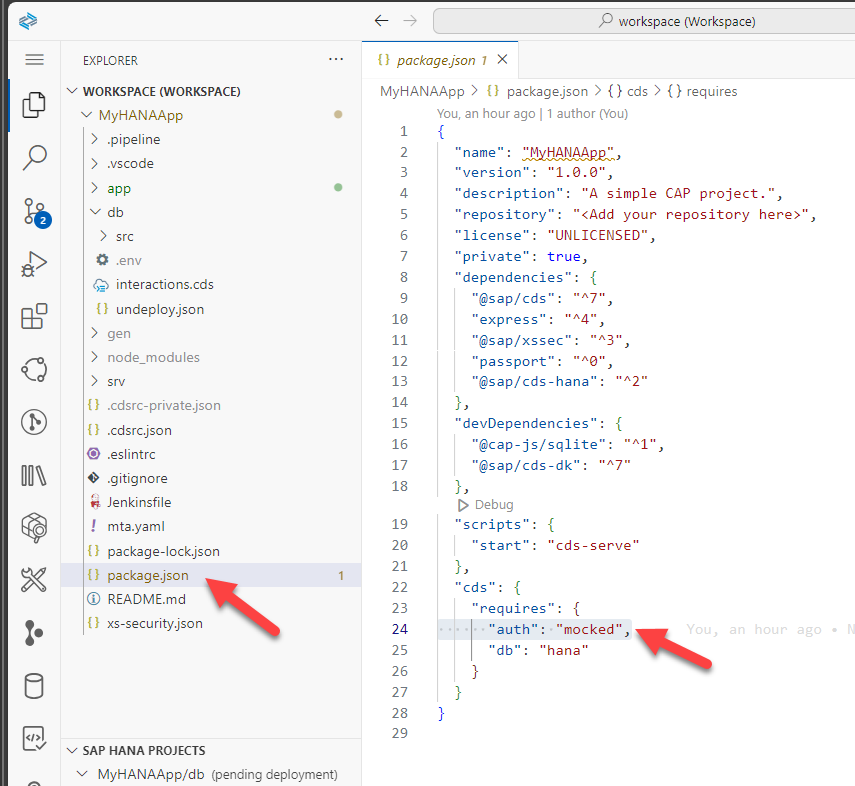
Now issue the command
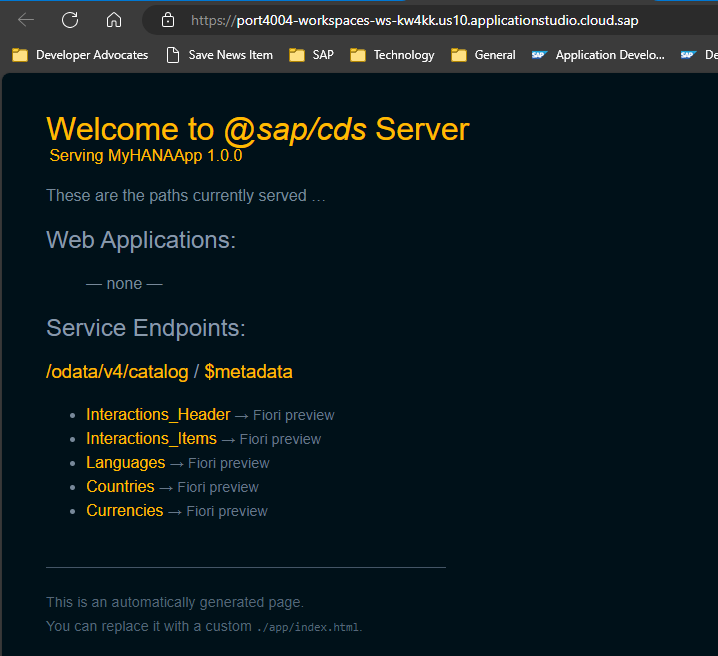
cds watch --profile hybrid. This will start the CAP service locally and use the binding configuration to connect to our remote HANA database instance. Once started you will see a dialog with a button that says Open in New Tab. Press this button to test the CAP service in a new browser tab.
If you accidentally close this dialog, you can always open the running services via View > Command Pallette and then choosing Ports: Preview and choosing the running service from the list
You should see the list of entities you exposed.
You can click on the entities to see the values in a JSON format being served from the SAP HANA Cloud database.

Test the services
Choose the
$metadataoption from the Welcome page and you can see a technical description of the service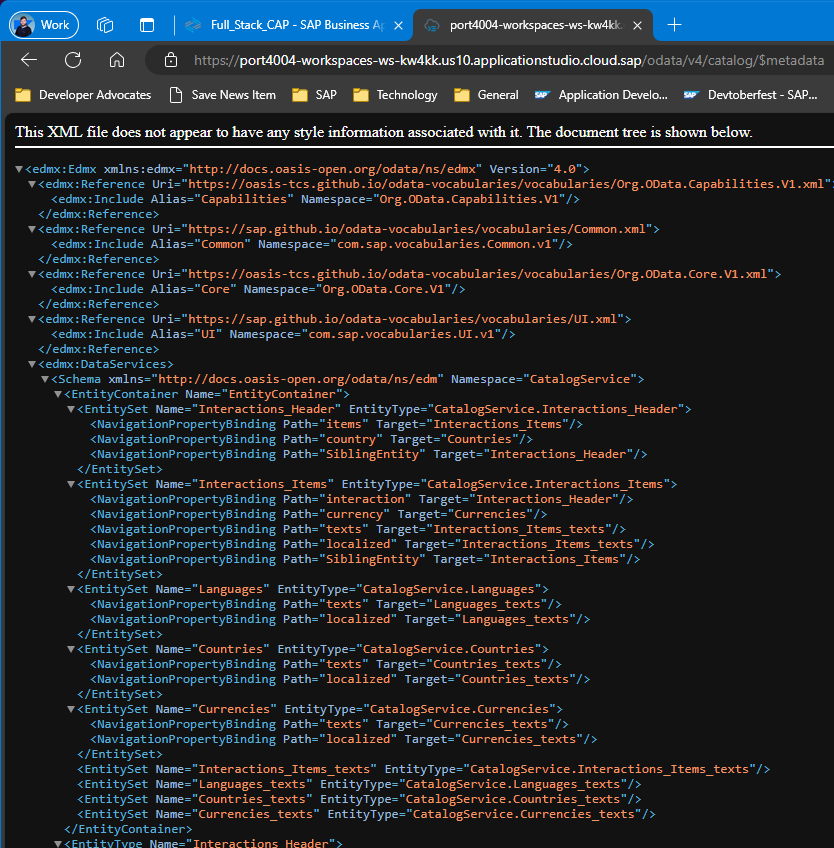
You can use different methods in the OData v4 services you have created. Go back to the welcome page for the service and click
Interactions_Items. Different versions of the Cloud Application Programming Model preview page do different things at this point. Some add a $top limit to the generated URL forInteractions_Itemsautomatically. Other and perhaps newer versions do not. Have a look at the end of the URL when it opens. If it ends in?$top=11then add the following to the URL:URL&$search=DEOtherwise add the following to the URL:
URL?$search=DE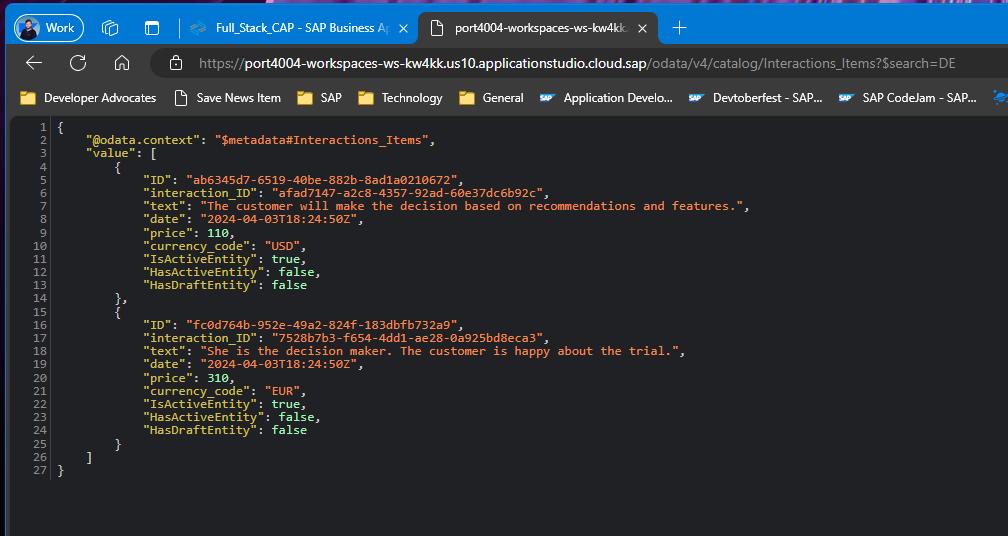
You can find out more about OData V4 at the OData organization and the documentation for SAPUI5.
Configure routing
You will use an Application Router module. This was generated into a project using the initial wizard. This module is very important as it will become the entry point for your application. Every request coming to this module will be routed into the different backend services.
You should see a folder named
app/routerin the root of your project.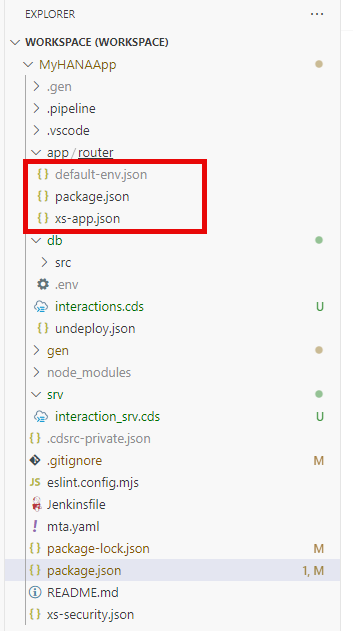
Since the web module will be receiving the requests and routing them into the proper processing backend services, such as the OData service you have just tested, it will also be responsible for enforcing authentication.
These routing logic is done by an application called
approuter. You can see the Node.js module being called as the starting script for the web module as defined in the filepackage.json.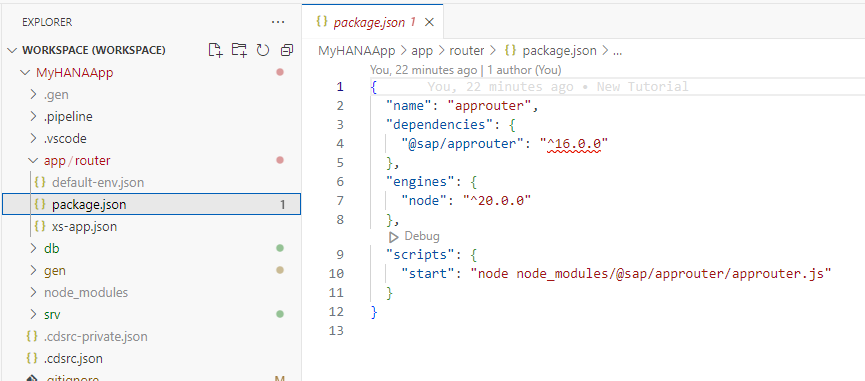
We need to install the approuter dependency now as well. From the terminal change to the
app/routerfolder and issue the commandnpm install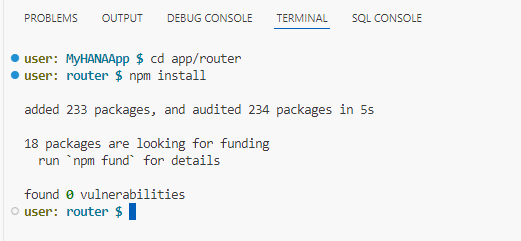
The
approuterwill scan the filexs-app.jsonto route patterns in the request to the right destinations. The xs-app.json that was generated by the wizard is ready to use real security settings, but our project isn't that far along yet. Therefore, let's change the configuration to temporarily disable the security checks.Replace the content of
xs-app.jsonwith the following contentjson{ "authenticationMethod": "none", "routes": [ { "source": "^/app/(.*)$", "target": "$1", "localDir": ".", "cacheControl": "no-cache, no-store, must-revalidate" }, { "source": "^/appconfig/", "localDir": ".", "cacheControl": "no-cache, no-store, must-revalidate" }, { "source": "^/(.*)$", "target": "$1", "destination": "srv-api", "csrfProtection": true } ] }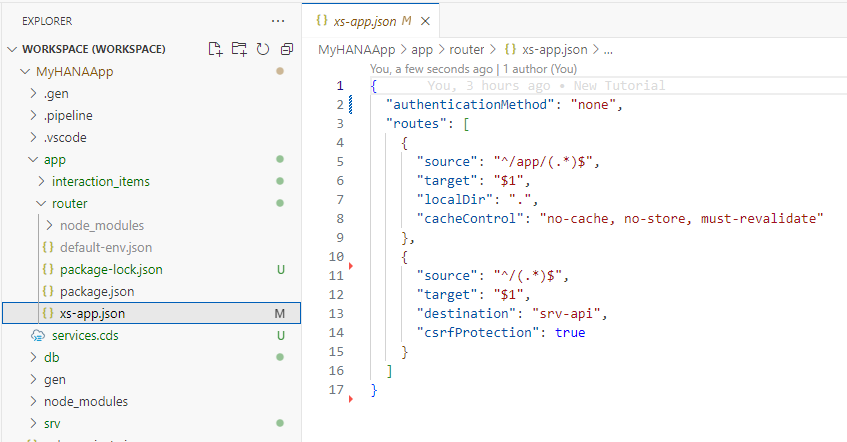
Among other information, this configuration is declaring that requests containing the pattern
^/(.*)$are routed to a destination calledsrv-api. This destination was defined by the wizard in themta.yamlfile and points the service layer of our CAP application.
Create a Fiori web interface
We want to create a Fiori UI for our CAP service. We will use the wizards to generate most of the UI.
From the top menu select View -> Command Pallette. Then type
fioriinto the search box. Select Fiori Open Application Generator.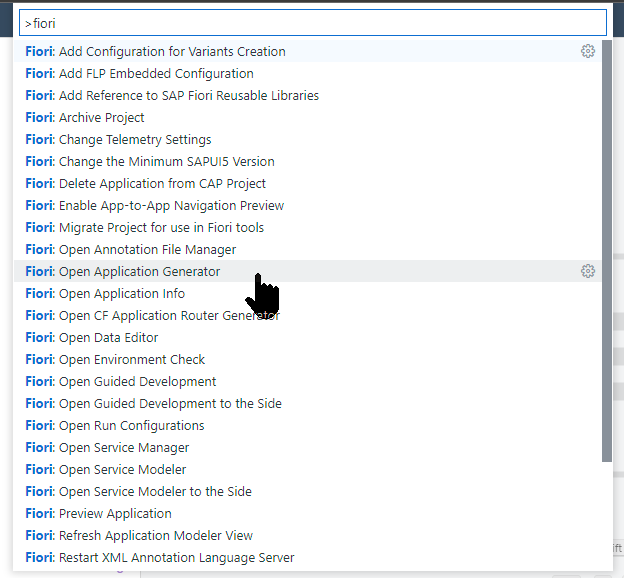
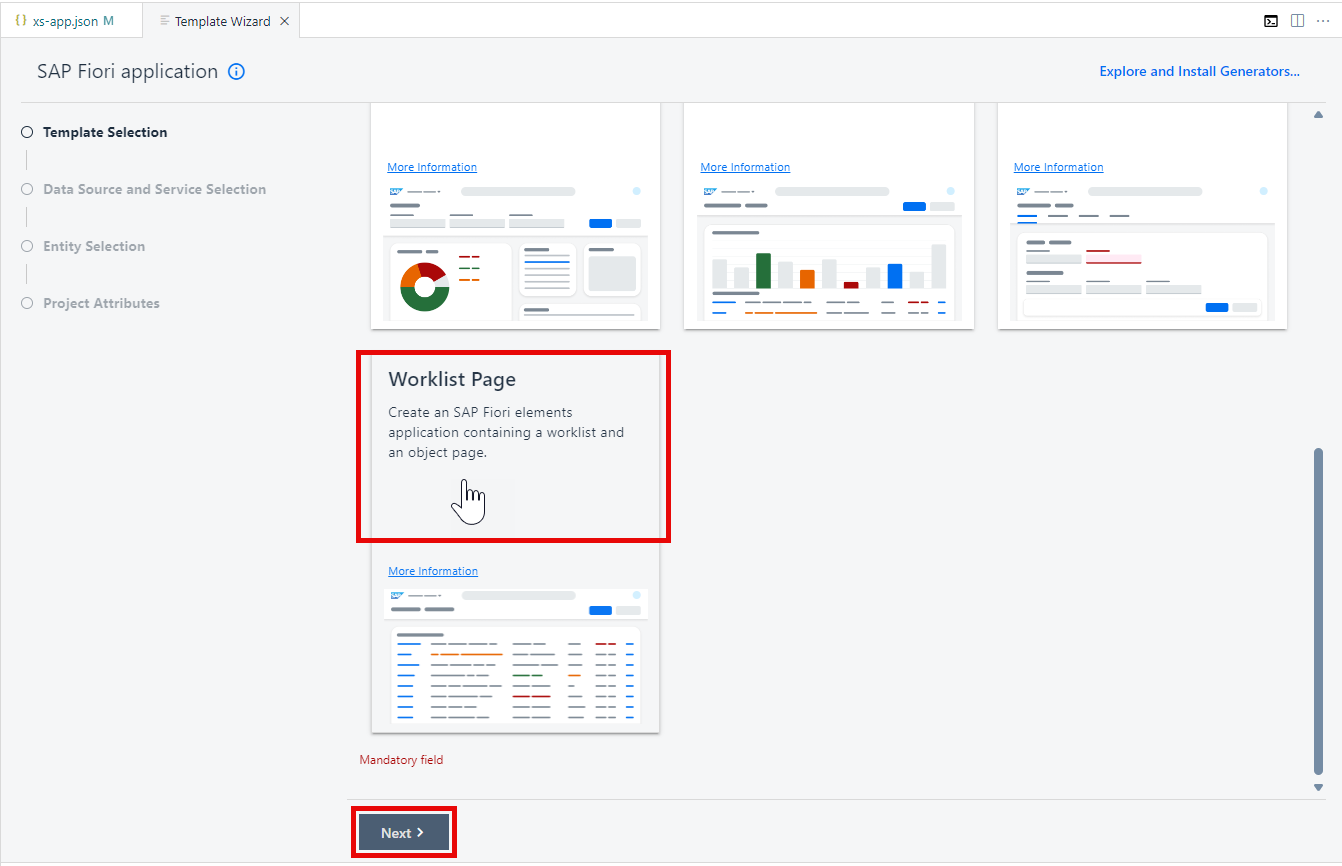
Select Worklist Page as the template and press Next
At the Data Source and Service Selection screen, choose Use a Local CAP Project. Select your project as the Choose your CAP project. Select
CatalogService (Node.js)as your OData service. Press Next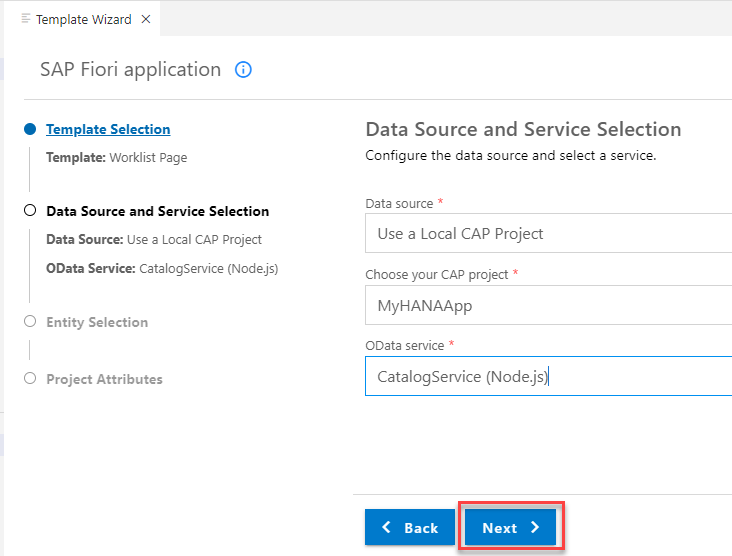
Choose
Interactions_Headeras the main entity,ITEMSfor the Navigation entity, leave theYESvalue for the "Automatically add table columns to the list page and a section to the object page if none already exists?" option and press Next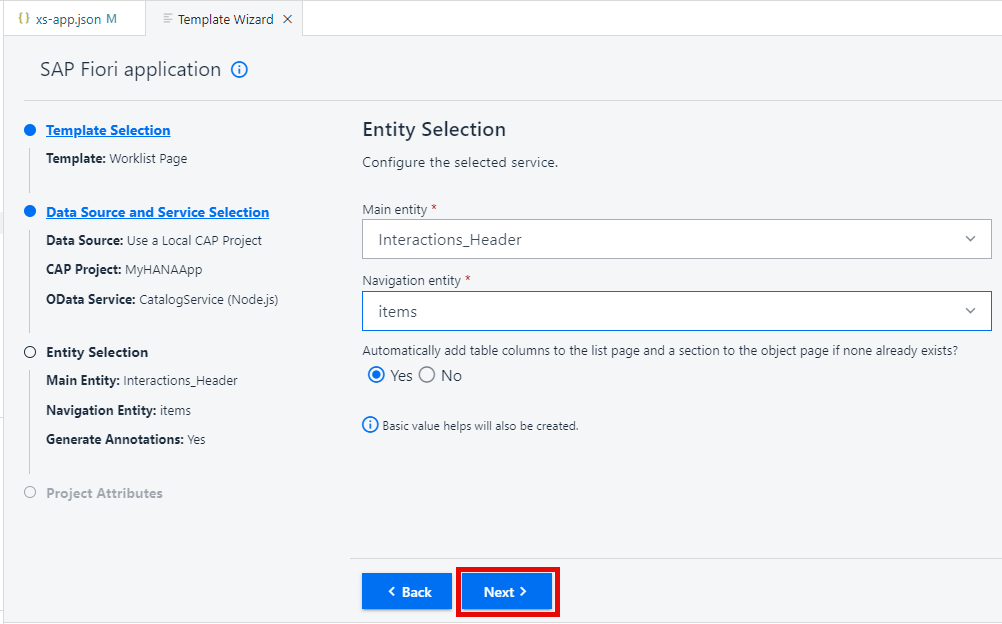
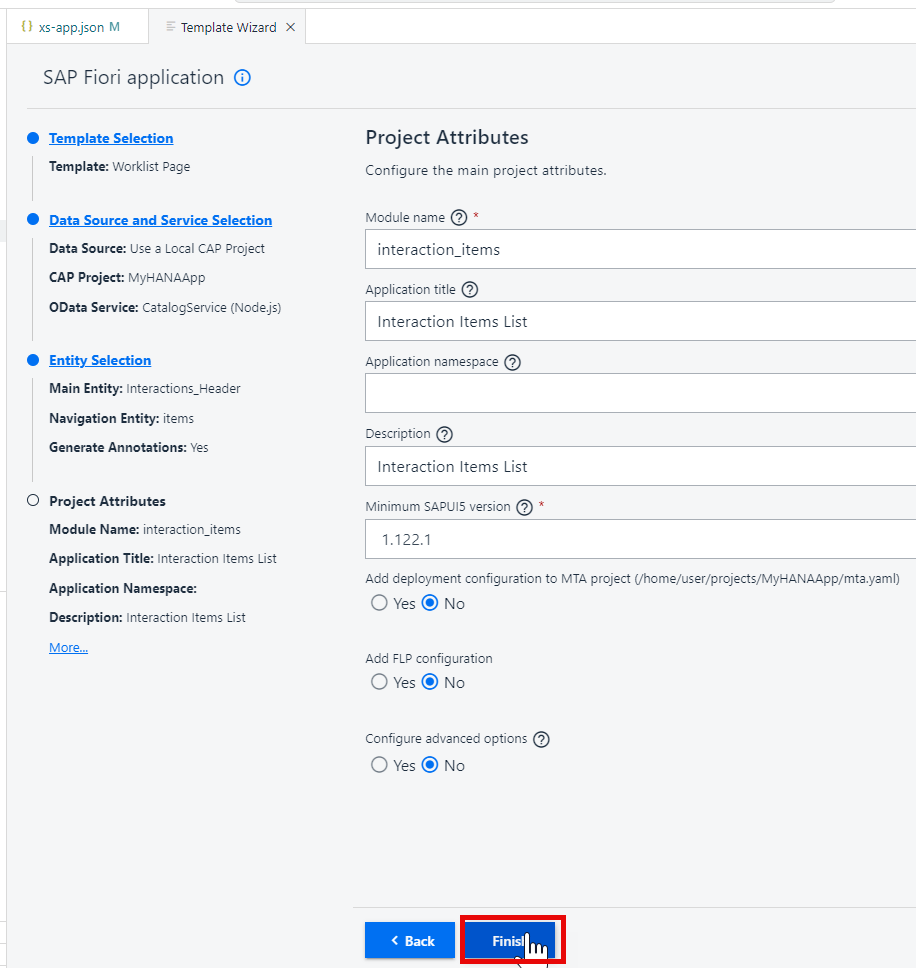
In the Project Attributes screen, match to the values shown in the following screenshot and press Finish
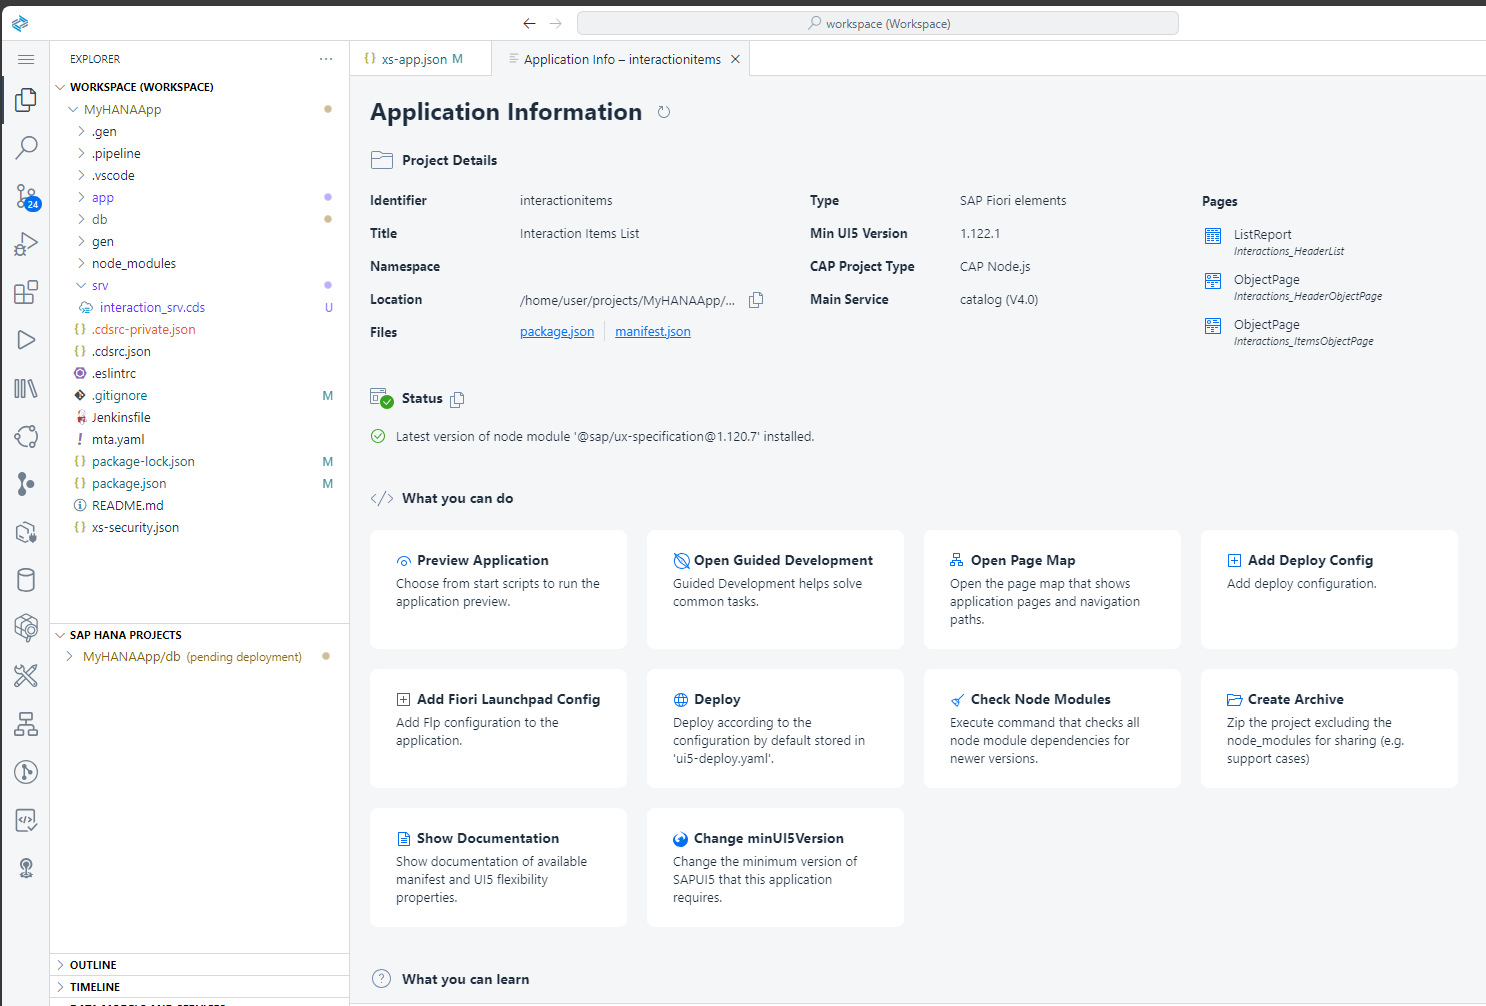
The new project structure and content should look like This
From the terminal you should still have your
cds watch --profile hybridstill running (if not restart it). This command watches for changes so your application is already to test with the new UI. Open the browser tab where you were testing it previously.The CAP test page now has a link to the newly generated application.
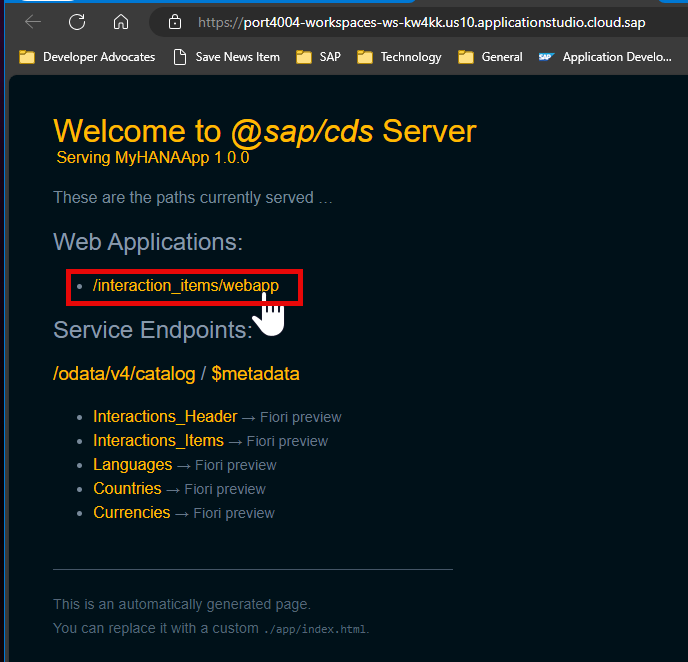
Clicking that link will launch the generated Fiori UI for the CAP service.
If you wish you can open another terminal instance and change to the Application Router folder (
cd app/router/). Then run the commandnpm start. This will run the Application Router which you can test from its own port (5000). Nothing will really look different at this point, but you are passing all requests through the Application Router now. This will become important once we add security to our service and want to test it locally using the Application Router.
Enahance the Fiori UI via Annotations
The Fiori application template wizard already created an annotations.cds file with some basic annotation entries for your application. This is how the preview that we used in the last step already had
partnerandcountry_codefields in the output.
Let's now extend the wizard generated annotations to include more fields in our application. With a few lines of annotations we can reshape the entire UI.
Replace the
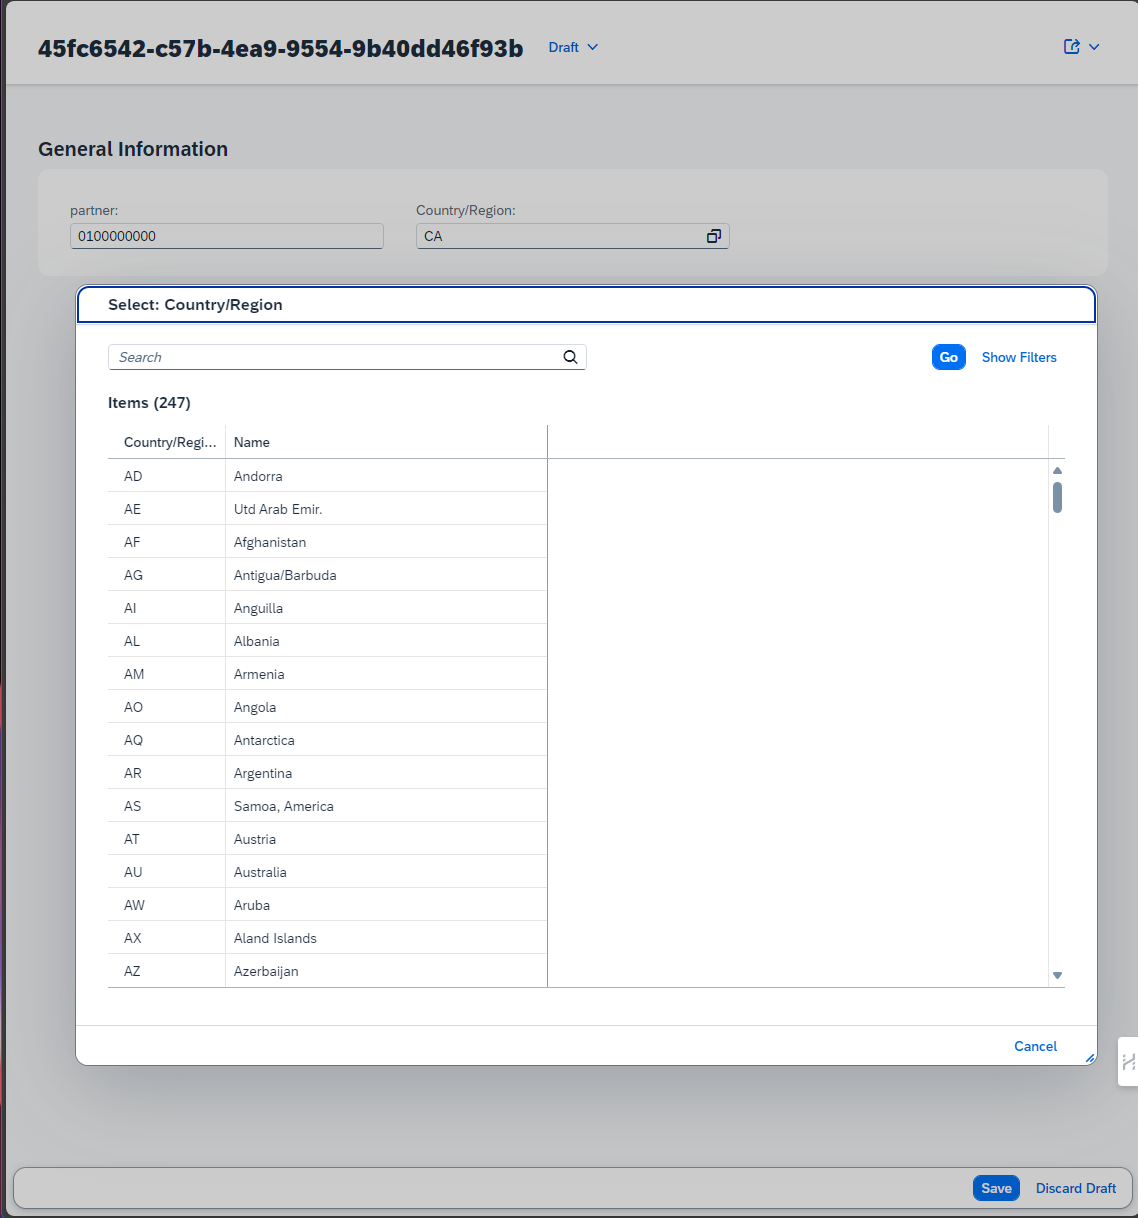
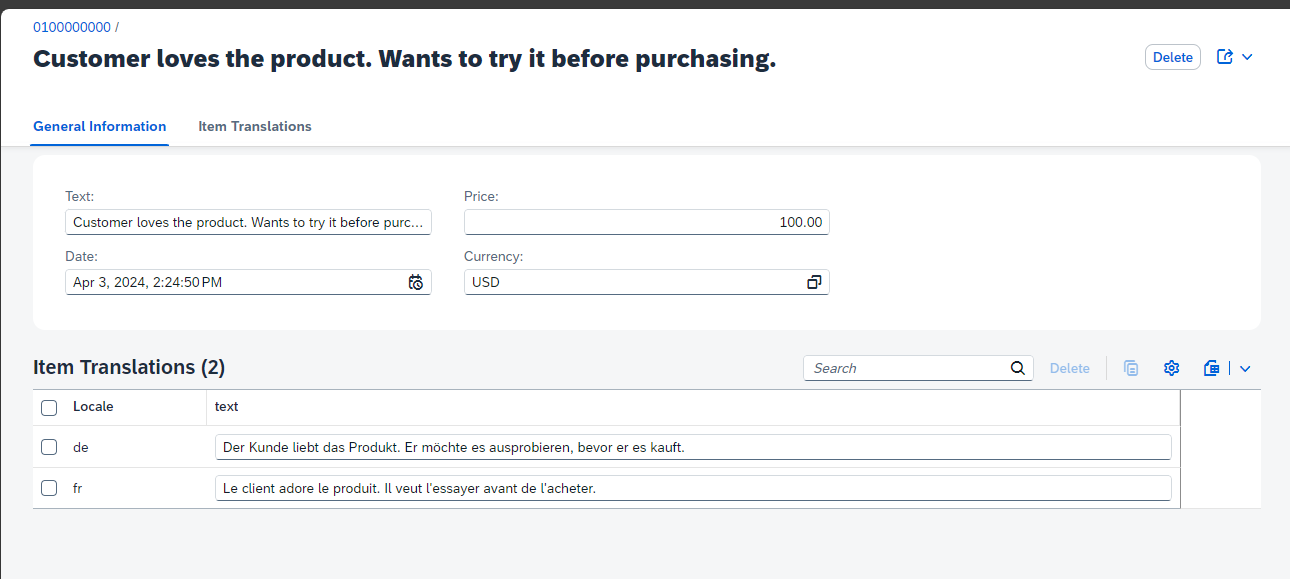
annotations.cdswith the following content:cdsusing CatalogService as service from '../../srv/interaction_srv'; annotate service.Interactions_Header with @( UI.HeaderInfo : { Title : { $Type: 'UI.DataField', Value: partner, }, TypeName : 'Incident', TypeNamePlural: 'Incidens', Description : {Value: country.descr} }, UI.HeaderFacets : [{ $Type : 'UI.ReferenceFacet', Target : '@UI.FieldGroup#Admin' }], UI.FieldGroup #GeneratedGroup: { $Type: 'UI.FieldGroupType', Data : [ { $Type: 'UI.DataField', Label: 'Partner', Value: partner, }, { $Type: 'UI.DataField', Label: 'Country', Value: country_code, }, { $Type : 'UI.DataField', Label : 'Country', ![@Common.FieldControl]: #ReadOnly, Value : country.descr, }, ] }, UI.FieldGroup #Admin : {Data : [ { $Type : 'UI.DataField', Value : createdBy }, { $Type : 'UI.DataField', Value : modifiedBy }, { $Type : 'UI.DataField', Value : createdAt }, { $Type : 'UI.DataField', Value : modifiedAt } ] }, UI.Facets : [ { $Type : 'UI.ReferenceFacet', ID : 'GeneratedFacet1', Label : 'General Information', Target: '@UI.FieldGroup#GeneratedGroup', }, { $Type : 'UI.ReferenceFacet', Label : 'Interaction Items', Target: 'items/@UI.LineItem' } ], UI.LineItem : [ { $Type: 'UI.DataField', Label: 'Partner', Value: partner, }, { $Type : 'UI.DataField', Label : 'Country', ![@Common.FieldControl]: #ReadOnly, Value : country.name, }, ] ); annotate service.Interactions_Items with @( UI.HeaderInfo : { Title : { $Type: 'UI.DataField', Value: text, }, TypeName : 'Interaction Item', TypeNamePlural: 'Interaction Items' }, UI.FieldGroup #GeneratedGroup: { $Type: 'UI.FieldGroupType', Data : [ { $Type: 'UI.DataField', Label: 'Text', Value: text, }, { $Type: 'UI.DataField', Label: 'Date', Value: date, }, { $Type: 'UI.DataField', Label: 'Price', Value: price, }, { $Type: 'UI.DataField', Label: 'Currency', Value: currency_code, } ] }, UI.Facets : [ { $Type : 'UI.ReferenceFacet', ID : 'GeneratedFacet1', Label : 'General Information', Target: '@UI.FieldGroup#GeneratedGroup', }, { $Type : 'UI.ReferenceFacet', Label : 'Item Translations', Target: 'texts/@UI.LineItem' } ], UI.LineItem : [ { $Type: 'UI.DataField', Label: 'Text', Value: text, }, { $Type: 'UI.DataField', Label: 'Date', Value: date, }, { $Type: 'UI.DataField', Label: 'Price', Value: price, }, { $Type: 'UI.DataField', Label: 'Currency', Value: currency_code, } ] ); annotate service.Interactions_Items.texts with @(UI: { Identification : [{Value: text}], SelectionFields: [ locale, text ], LineItem : [ { Value: locale, Label: 'Locale' }, {Value: text} ] }); annotate service.Interactions_Items.texts with { ID @UI.Hidden; }; // Add Value Help for Locales annotate service.Interactions_Items.texts { locale @( ValueList.entity: 'Languages', Common.ValueListWithFixedValues, ) }Run the application again and you will new functionality including value help for country and currency as well as the ability to see and maintain the translatable text element.
Congratulations! You have created your first, full application.
Now it is a good time to commit your application into the local or remote Git.
What the tutorial covers: You will use the Fiori Application Generator wizard in BAS to create a List Report app targeting
CatalogService. The wizard reads your CAP service's$metadataand generatesmanifest.jsonandannotations.cdsautomatically.Where the generated files land: All UI artifacts are placed under
app/interaction_items/. The annotations file (annotations.cds) is what you will edit to change which fields appear in the list and object pages. Do not editmanifest.jsonrouting targets by hand — use the Fiori tools page map instead.
Exercise 4.2 — Add and Configure the Application Router
The Application Router is a separate Node.js module that must be added to your project and wired to the CAP service via a named destination.
👉 Follow the app router setup steps in the tutorial above to add app/router/package.json, app/router/xs-app.json, and the corresponding mta.yaml entries.
Why a separate module? The Application Router runs as its own MTA module in BTP. This gives it an independent scaling policy and keeps the authentication/routing logic decoupled from the business logic in the CAP service module.
The
srv-apidestination:mta.yamldefines aprovidesblock namedsrv-apiin the CAP service module. The Application Router module consumes it via arequiresentry. BTP resolves this at deployment time and injects the correct backend URL into the router's environment — no hard-coded URLs needed.
Summary
At the end of this exercise you have:
- An SAPUI5 Fiori Elements List Report app (
app/interaction_items/) driven entirely by CDS UI annotations - A
manifest.jsonconnecting the app to/odata/v4/catalog/and defining three navigation targets (list, header object page, items object page) - An Application Router (
app/router/) that serves the UI and proxies API calls to the CAP service via thesrv-apidestination - A
default-env.json(orcds bindequivalent) that lets you test the full stack locally without deploying to BTP
Questions for Discussion
We added an Application Router to the project. What is it, and why is it needed?
Answer
The Application Router (
@sap/approuter) is a Node.js reverse proxy that acts as the single entry point for the browser. In the MTA architecture, the browser never talks directly to the CAP service — it always goes through the router.The router handles three responsibilities that would otherwise have to be duplicated in every backend service:
- Authentication — it redirects unauthenticated users to the XSUAA login page and validates JWT tokens on every request, so the CAP service only ever sees authenticated traffic.
- Request routing — rules in
xs-app.jsonmap URL patterns to destinations. The catch-all rule"source": "^/(.*)"with"destination": "srv-api"forwards all OData calls to the CAP service; the/app/rule serves the static SAPUI5 files locally. - CSRF protection — the
"csrfProtection": trueflag on the backend route means the router enforces CSRF token exchange for state-changing OData operations, protecting against cross-site request forgery without any code in the CAP service.
Without the router, every BTP microservice would need to implement its own OAuth2 flow — the router centralises that complexity in one place.
Why does
default-env.jsonwork for local development? What role does @sap/xsenv play, and how doescds bindavoid the need for it?Answer
When a BTP application runs in the cloud, service credentials (HANA, XSUAA, etc.) are injected automatically as the
VCAP_SERVICESenvironment variable.@sap/xsenvis a utility library that readsVCAP_SERVICESand makes those credentials accessible in a structured way — both@sap/approuterand CAP use it internally.During local development, there is no BTP runtime to inject
VCAP_SERVICES.default-env.jsonis a local substitute: place your service credentials in that file and@sap/xsenvreads it as if it wereVCAP_SERVICES. This is why the app can authenticate against a real HANA Cloud instance from your laptop.cds bindis a cleaner alternative. Runningcds bind --to <service-instance-name>stores a reference to the live BTP service binding in a.cdsrc-private.jsonfile (never committed to git). When you start the CAP server locally, it resolves those bindings on the fly — no credential file to manage, no risk of committing secrets, and the bindings stay in sync with BTP automatically.What is the difference between a standalone and a managed Application Router, and when would you use each?
Answer
Standalone Managed Ownership You deploy and maintain @sap/approuteras your own MTA moduleSAP runs it as a BTP service — you configure it, SAP operates it Configuration Full control via xs-app.json, custom middleware, npm scriptsConfiguration via the HTML5 App Repository service; limited extensibility Updates You control when the @sap/approuternpm version is bumpedSAP keeps it current automatically Use case Custom authentication flows, non-standard routing, on-premise destinations, complex middleware requirements Standard Fiori launchpad scenarios on BTP where ease of operation matters more than customisation In this CodeJam we use the standalone router because it makes the routing configuration explicit and visible in
xs-app.json, which is the best way to understand how the pieces connect. In production SAP BTP projects, the managed router is more common for standard Fiori apps because it reduces operational overhead.What is CAP hybrid testing (
cds bind), and why does it matter for developers?Answer
Hybrid testing means running the CAP server locally while connecting to real BTP cloud services (HANA Cloud, XSUAA, etc.) instead of local mocks. This is the recommended development workflow because:
- Catches real integration issues early — local SQLite behaves differently from HANA (data types, case sensitivity, stored procedures). Running against the real HANA instance means issues surface during development, not at deployment.
- No credential files to manage —
cds bindstores a pointer to the BTP service instance, not the credentials themselves. The CAP runtime fetches a short-lived token at startup. - Fast iteration — you still get hot-reload (
cds watch) but against production-grade data and auth, without having to build and deploy an MTA every time.
The workflow is:
bashcds bind --to MyHANAApp-db # bind to the HDI container service instance cds bind --to MyHANAApp-xsuaa # bind to the XSUAA service instance cds watch --profile hybrid # start server using the live bindingsOpen
app/interaction_items/annotations.cds. Which annotation controls the columns shown in the list table? What would you change to add a new column — for example, thedatefield?Answer
The
UI.LineItemannotation controls the list table columns. Inannotations.cdsit looks something like:cdsannotate service.Interactions_Header with @( UI.LineItem: [ { $Type: 'UI.DataField', Label: 'Partner', Value: partner }, { $Type: 'UI.DataField', Label: 'Country', Value: country_code } ] );To add a
datecolumn from theInteractions_Itemsentity, you would add anotherDataFieldentry to the array:cds{ $Type: 'UI.DataField', Label: 'Date', Value: date }No JavaScript or controller code is needed — Fiori Elements reads the annotation at runtime and renders the column automatically. This is the core value proposition of the metadata-driven UI model: the UI is configured through data, not code.
What is the OData
$metadataendpoint, and what can you learn from it? Try navigating to it after starting the CAP server.Answer
The
$metadataendpoint is the OData service document — an XML document that describes every entity set, property, association, function import, and capability that the service exposes. It is what OData clients (including Fiori Elements) read to understand the shape of the data and the available operations.With your CAP server running, navigate to:
texthttp://localhost:4004/odata/v4/catalog/$metadataIn the document you can verify:
- All entity sets are present (
Interactions_Header,Interactions_Items,V_Interaction,Languages) - Each property's name and type matches your CDS definition
- The
sleepfunction import is registered (after Exercise 7) - The
@odata.draft.enabledflag onInteractions_Headerappears asOrg.OData.Capabilities.V1.NavigationRestrictions
Checking
$metadatais the first diagnostic step when a Fiori Elements UI behaves unexpectedly — if a field is missing from the metadata, it will never appear in the UI regardless of annotations.- All entity sets are present (
Further Study
- @sap/approuter on npm — full
xs-app.jsonconfiguration reference - @sap/xsenv on npm — how service bindings are resolved from
VCAP_SERVICESanddefault-env.json - CAP Hybrid Testing —
cds bindand the--profile hybridworkflow - Fiori Elements Feature Showcase App — interactive explorer for all Fiori Elements building blocks and annotations
- UI Annotations in CAP — how to write
UI.LineItem,UI.Facets, and other annotations in CDS - MTA Deployment Descriptor Reference — how
provides/requiresdestinations work inmta.yaml
Next
Continue to 👉 Exercise 5 - Add User Authentication to Your Application (SAP HANA Cloud)