Prerequisite
Complete Exercise 1 before starting this exercise.
Exercise 2 - Create an SAP Cloud Application Programming Model Project for SAP HANA Cloud
In this exercise you will use the SAP CAP project wizard in SAP Business Application Studio to scaffold a new CAP Node.js application that is pre-configured to target SAP HANA Cloud as its database. By the end you will have a working project skeleton, a Git repository to track your changes, and a Cloud Foundry login ready for HDI container deployment.
Background
SAP Cloud Application Programming Model (CAP) is SAP's opinionated framework for building full-stack cloud-native applications. Rather than writing raw SQL or low-level service code, you describe your data model and services in CDS (Core Data Services) — a high-level, declarative language — and CAP generates the boilerplate for you: OData endpoints, database tables, service bindings, and more.
By default, CAP uses an in-memory SQLite database for local development. To use SAP HANA Cloud instead, you need to configure the project for HDI (HANA Deployment Infrastructure) — the mechanism that deploys and manages database artifacts inside an isolated HANA container. The CAP wizard handles this configuration for you automatically.
Exercise 2.1 Create the CAP Project
The CAP project wizard in SAP Business Application Studio generates the project skeleton, sets up the package.json with the correct SAP dependencies, and adds the mta.yaml deployment descriptor needed for Cloud Foundry deployment.
Source
These steps are from Create an SAP Cloud Application Programming Model Project for SAP HANA Cloud on SAP Tutorials.
Create dev space in SAP Business Application Studio
Dev spaces are like isolated virtual machines in the cloud that can be quickly spun-up. Each dev space type contains tailored tools and pre-installed run-times for a target scenario such as SAP Fiori or mobile development. This simplifies and saves time in setting up the development environment as there's no need to install anything or upgrade; letting developers focus on their business domain, anytime, anywhere.
In this step we will create a new Dev Space configured for SAP Cloud Application Programming Model (CAP) development. If you already have a dev space configured for CAP and HANA development, you can skip this step as each dev space can hold multiple projects.
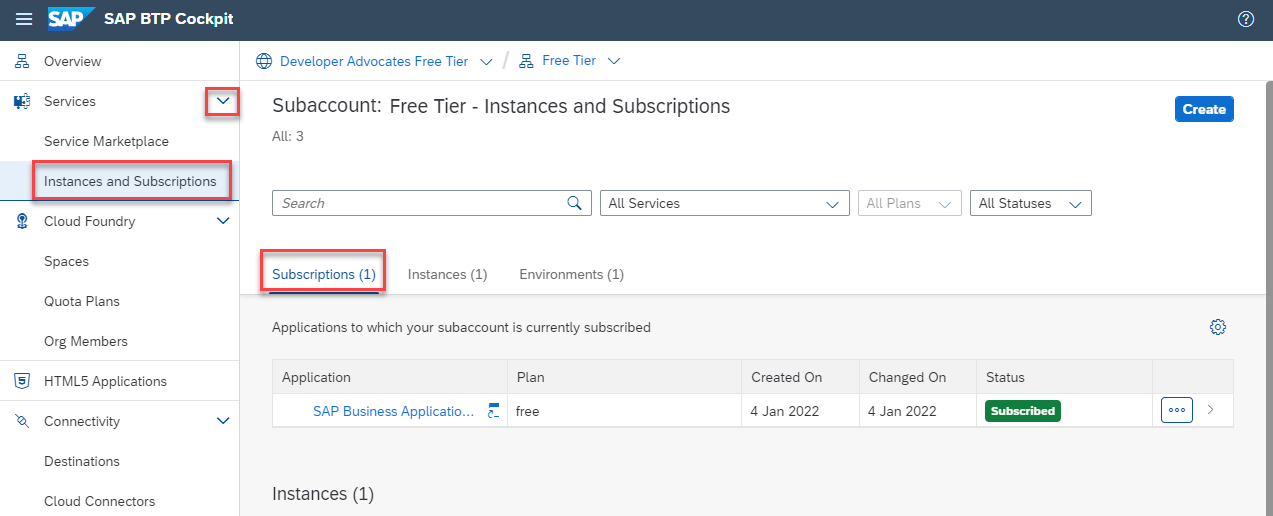
Go to your SAP Business Technology Platform subaccount and click the Services -> Instances and Subscriptions option.
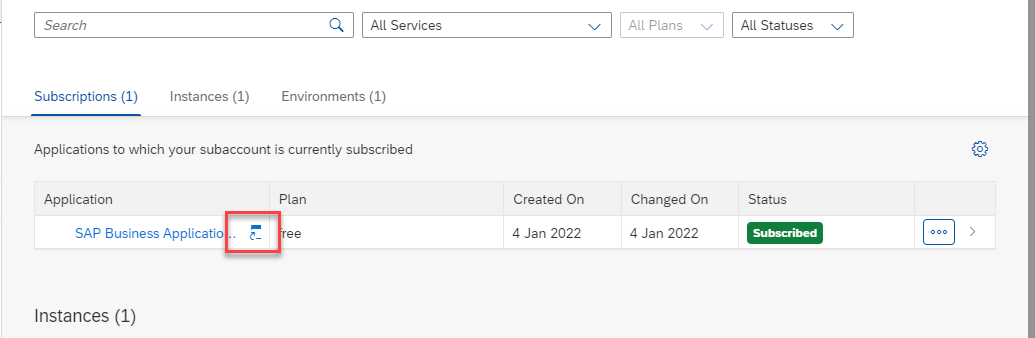
Locate the SAP Business Application Studio entry and click Go to Application
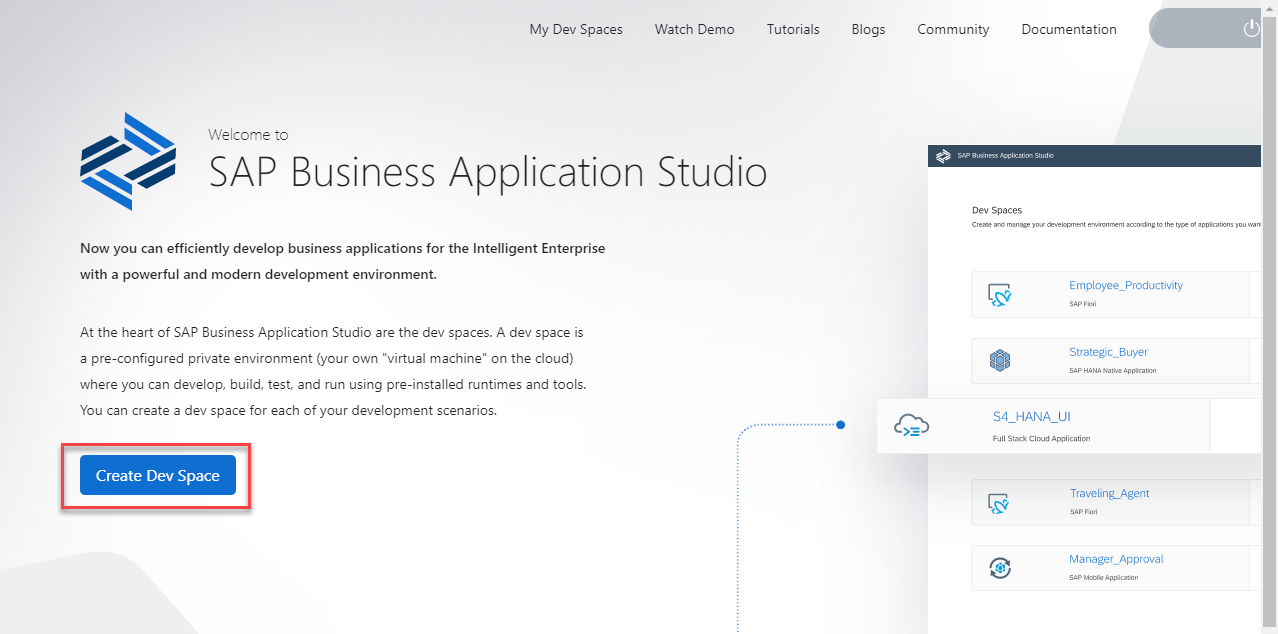
Choose Create Dev Space. Please NOTE: In the SAP BTP trial and free tier you are limited to only two Dev Spaces and only one can be active at a time. If you have performed other tutorials, you might already have reached your maximum. In that case you might have to delete one of the other dev spaces in order to continue with this tutorial.
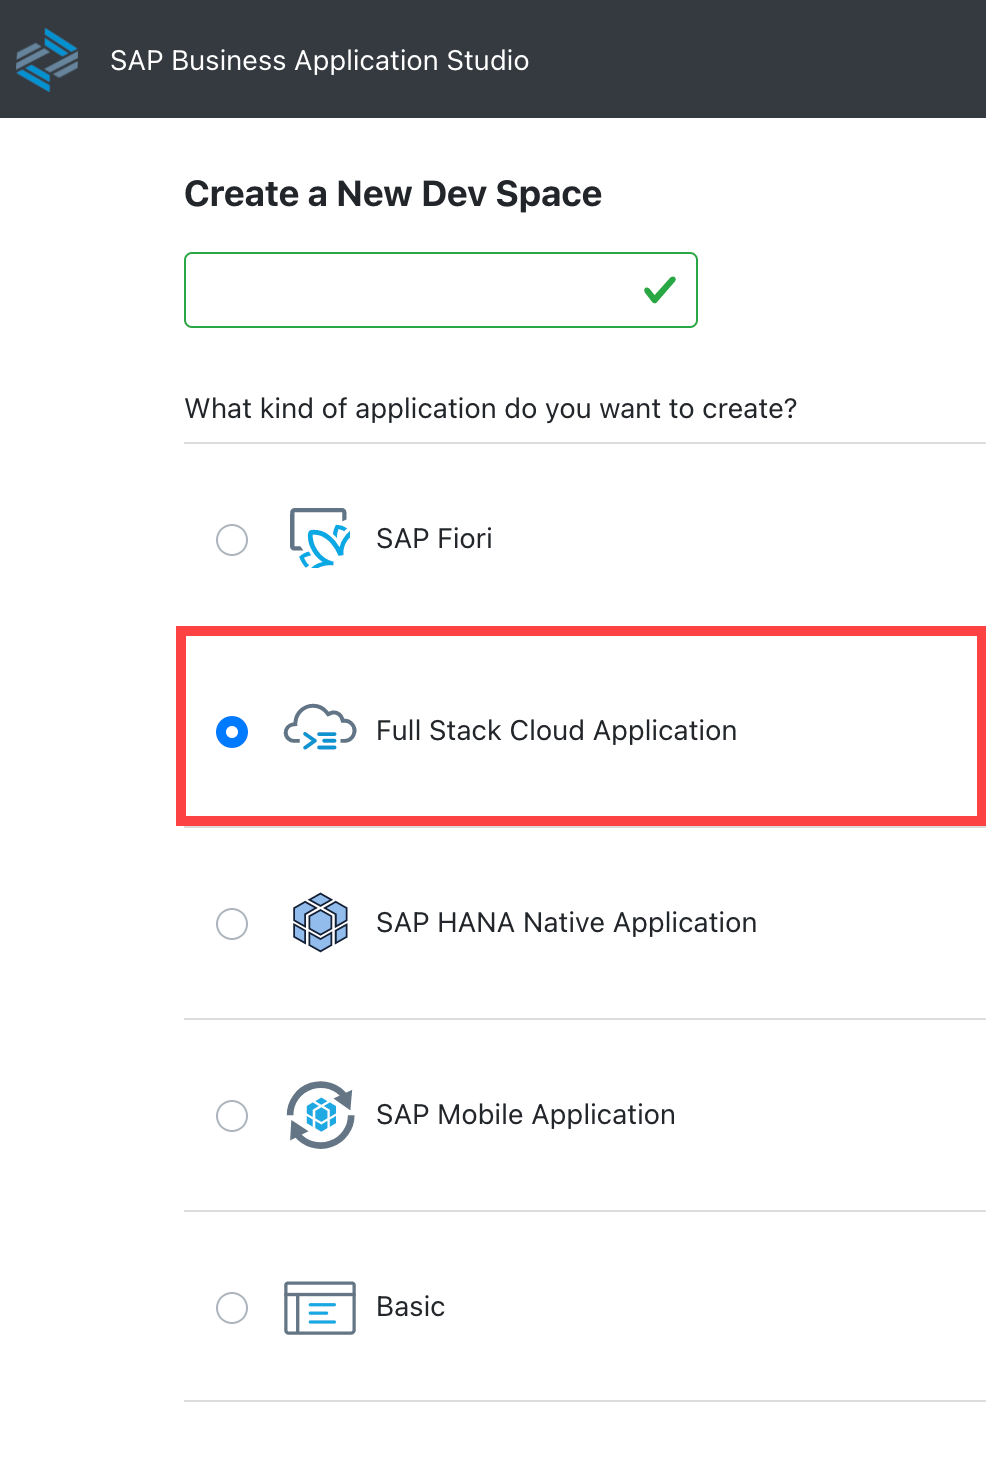
Enter any name you wish for your dev space name and choose Full Stack Cloud Application as the kind of application you are creating.
The Dev space will automatically be configured with the most common tools you need for the type of application you choose. However you can also choose additional, optional extensions. Since you want to combine CAP and HANA artifacts in the same project, we would ask that you also choose SAP HANA Calculation View Editor and SAP HANA Tools at minimum.
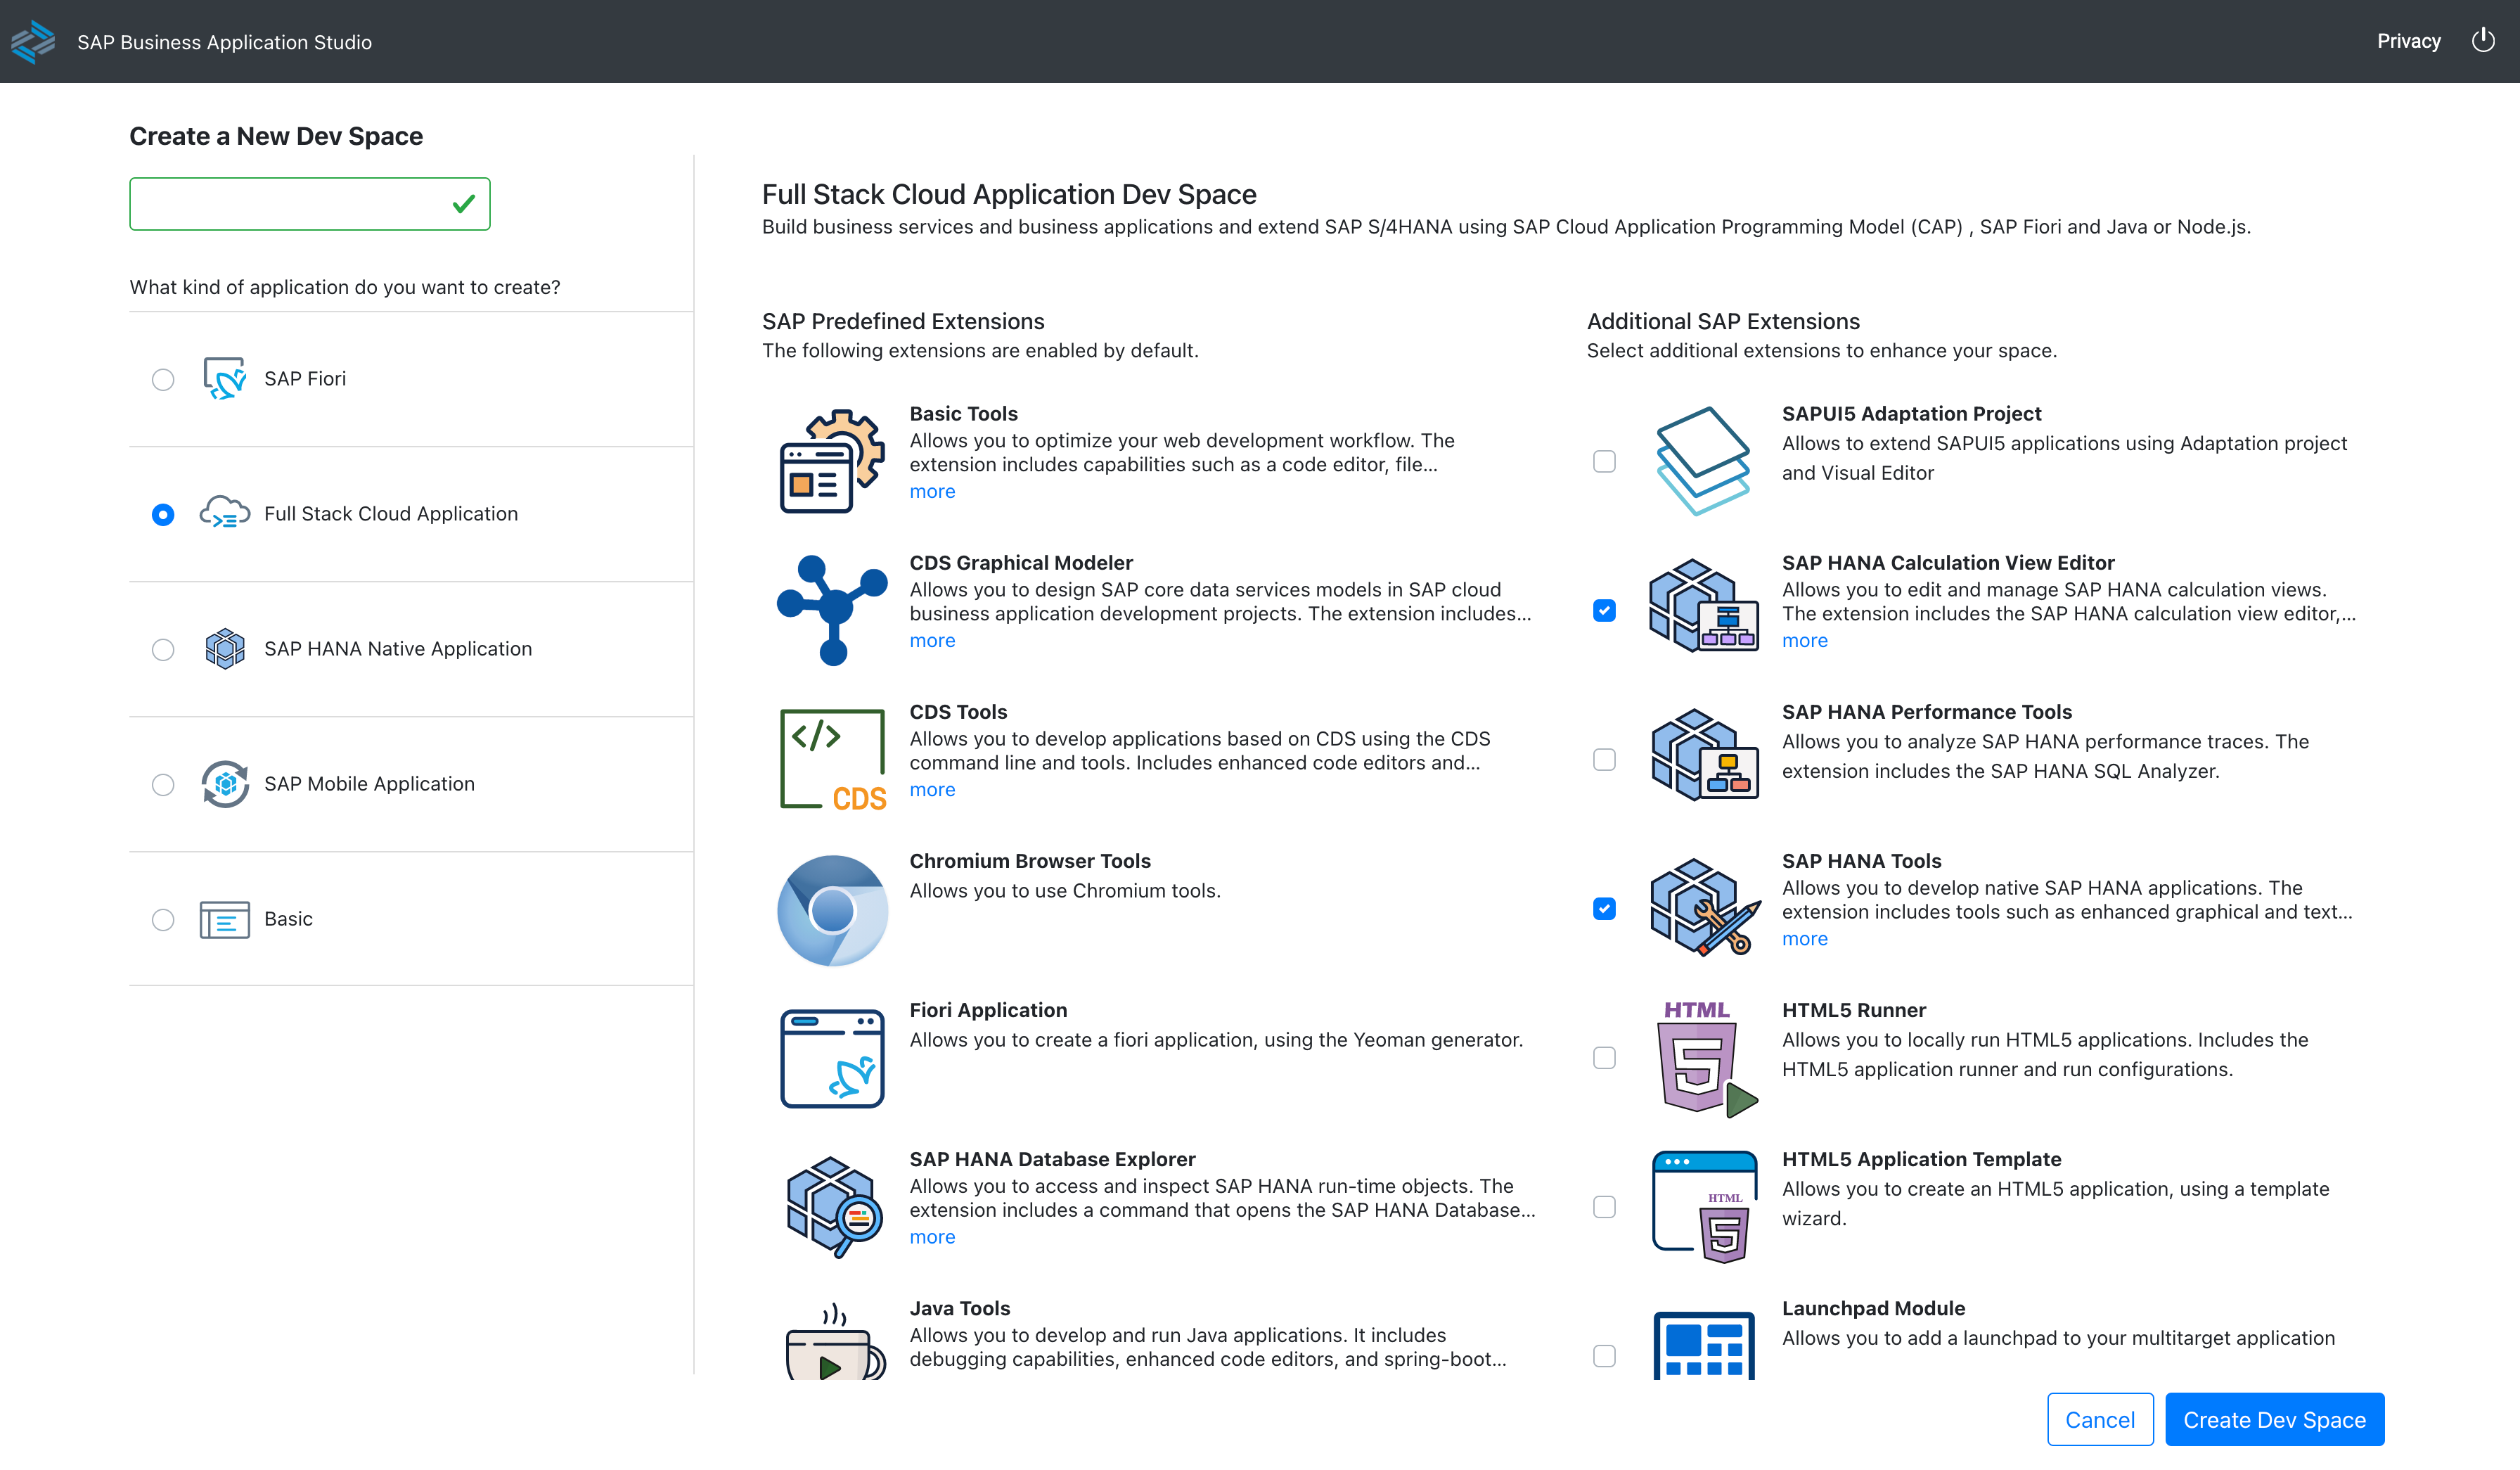
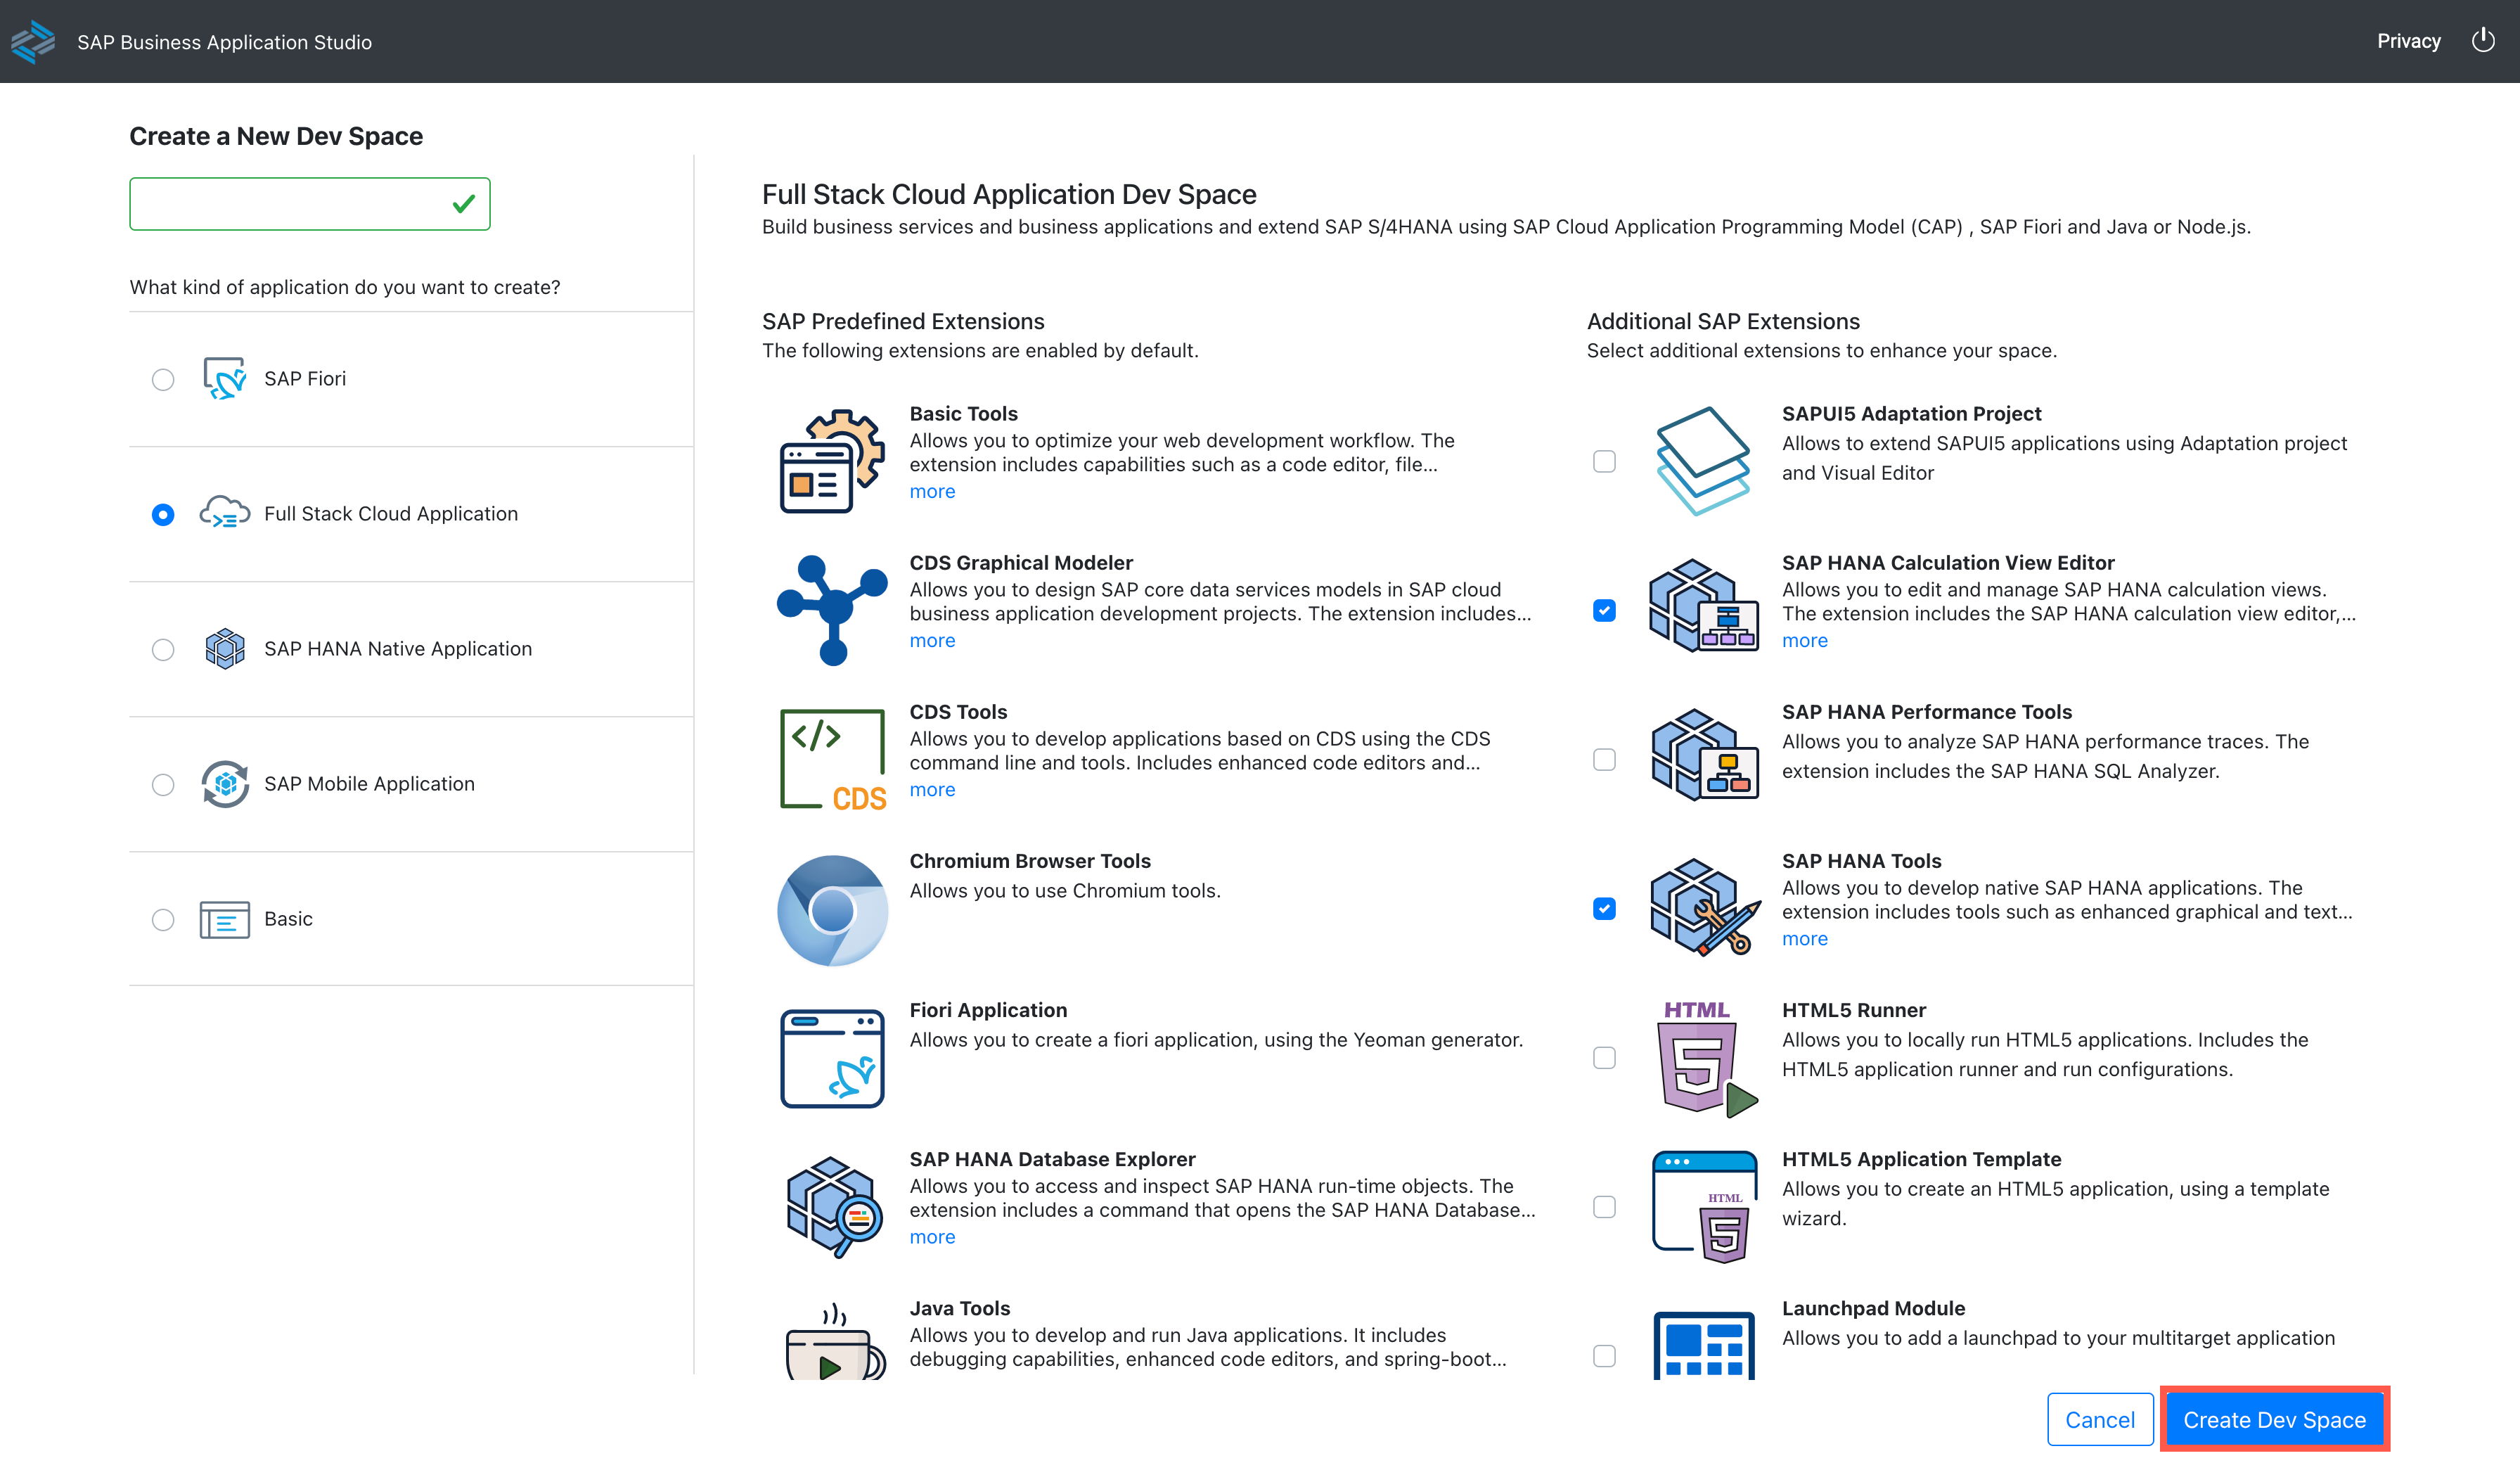
Once all selections are completed, press Create Dev Space
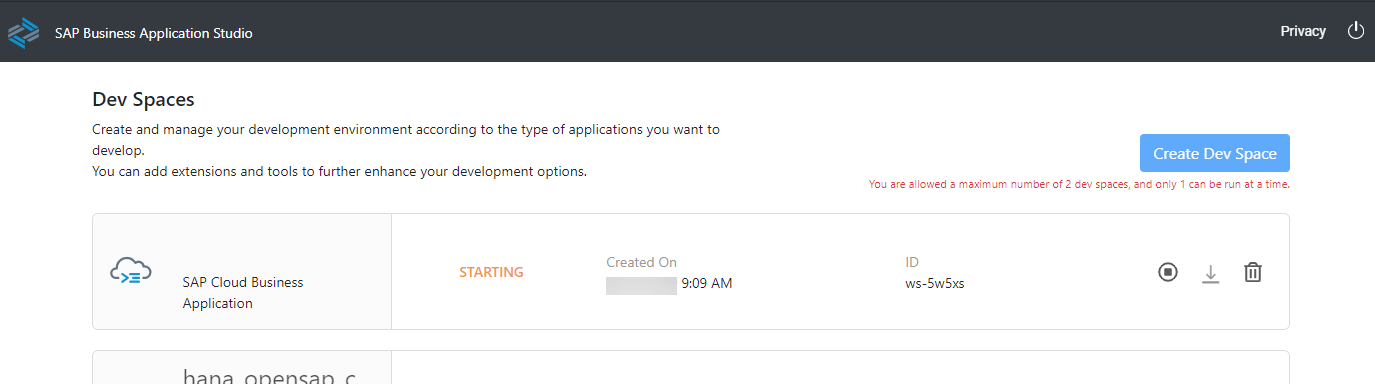
The Dev Space will then begin starting and the process will take a minute or so as your cloud environment is being created
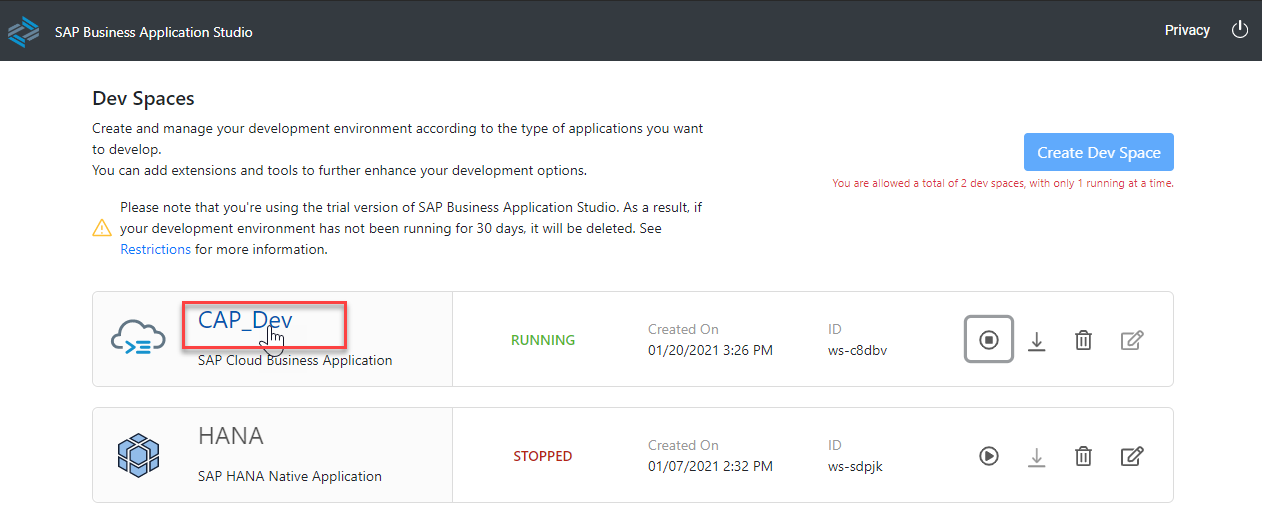
Once the Dev Space reaches the green status of RUNNING, you can click on the name of the Dev Space and it will load into the editor within your browser
You'll be redirected to your newly created SAP Business Application Studio Dev Space. We recommend you bookmark this URL so it's easier for you to access this dev space of your SAP Business Application Studio in the future
Configure dev space
Before we create our SAP HANA project, we want to do a few more one-time configuration steps to prepare the Dev Space
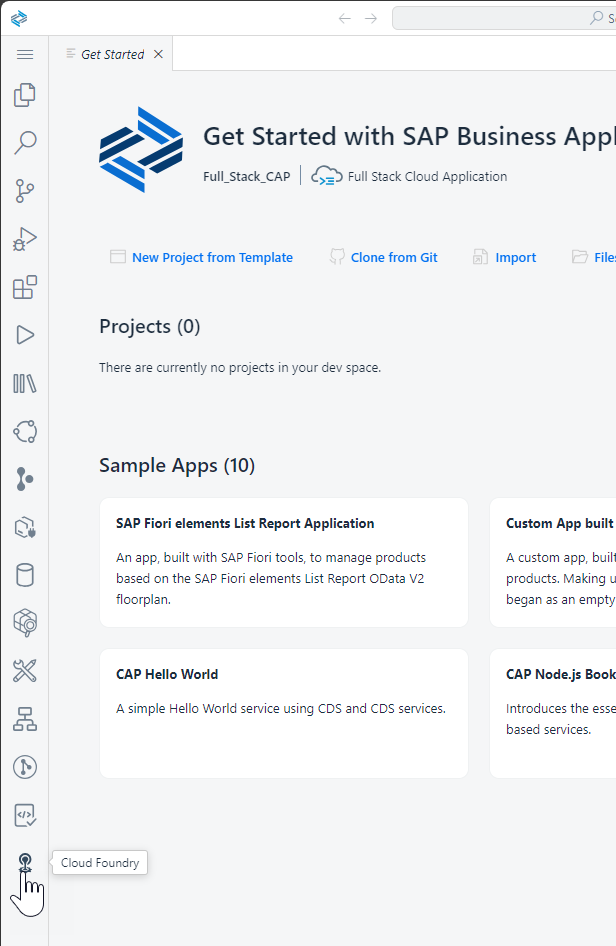
In the left side of the Business Application Studio click on the Cloud Foundry targets icon. Depending upon your screensize this option might be behind the expansion three dots (...).
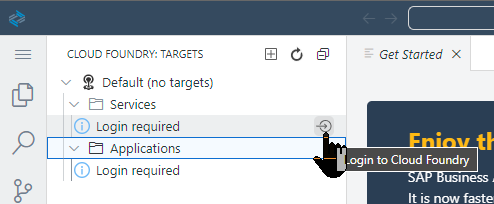
Now in the Cloud Foundry Targets window you can expand either Service or Applications and then click on the Logon icon to continue the configuration process
The Cloud Foundry Sign In and Targets window will then open in a side panel of the SAP Business Application Studio. The first input will prompt you for the API endpoint and your credentials
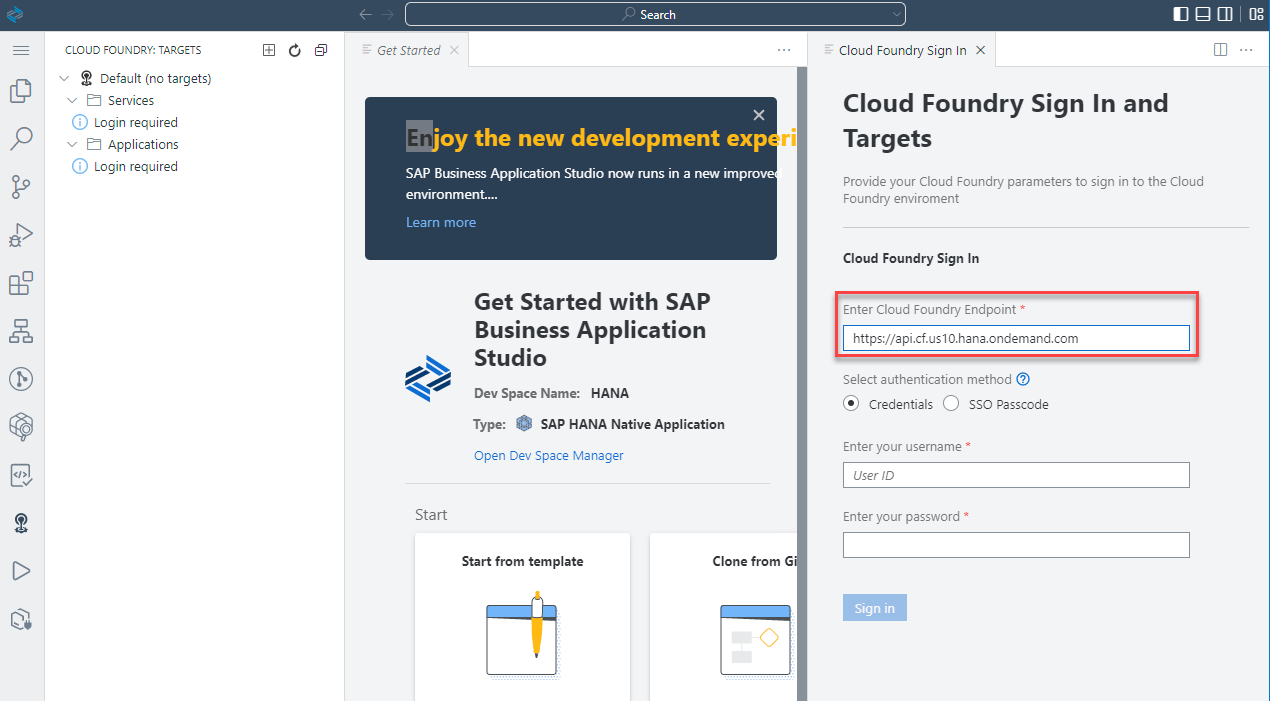
The default value proposed is not necessarily the correct value, please confirm. The value can be found in the SAP BTP cockpit at the Subaccount level
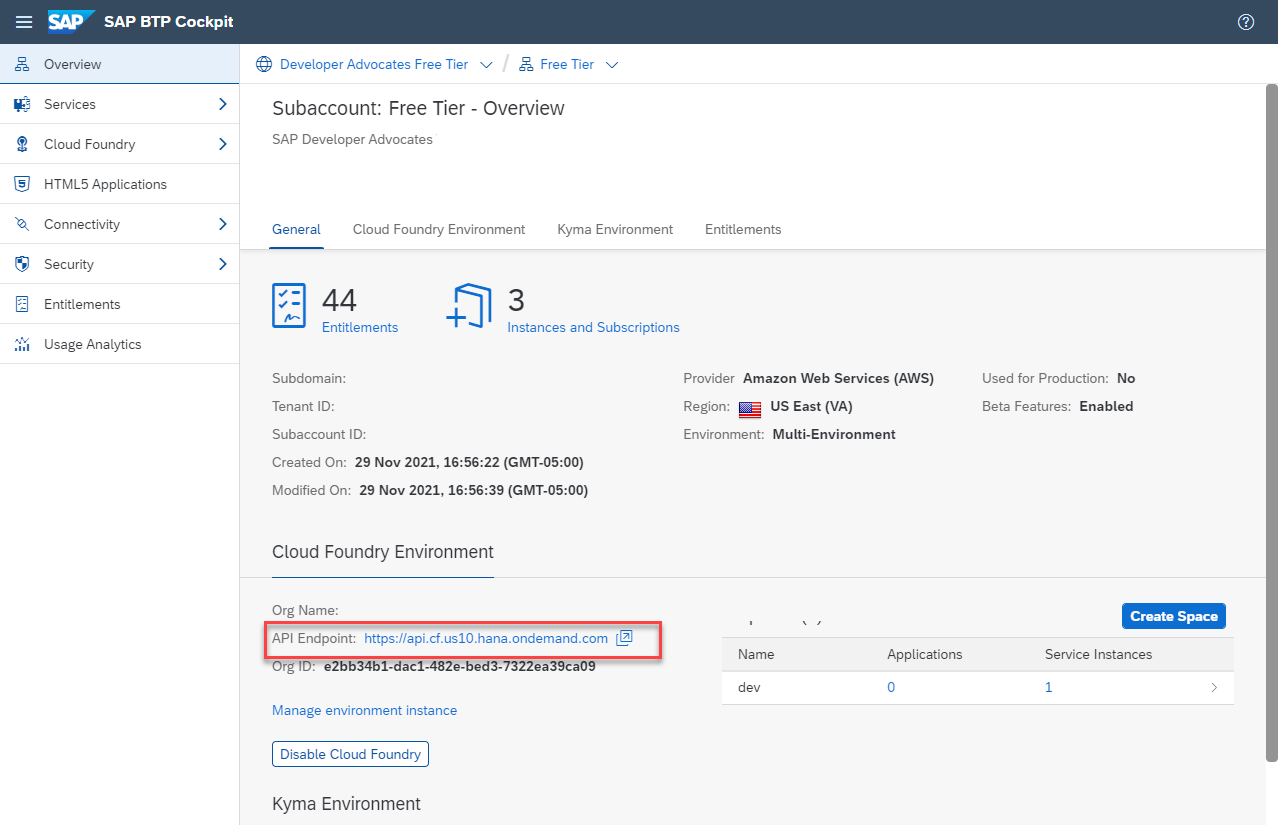
Once you have verified the API endpoint, input the email address you used to create your SAP BTP account and password and press Sign In.

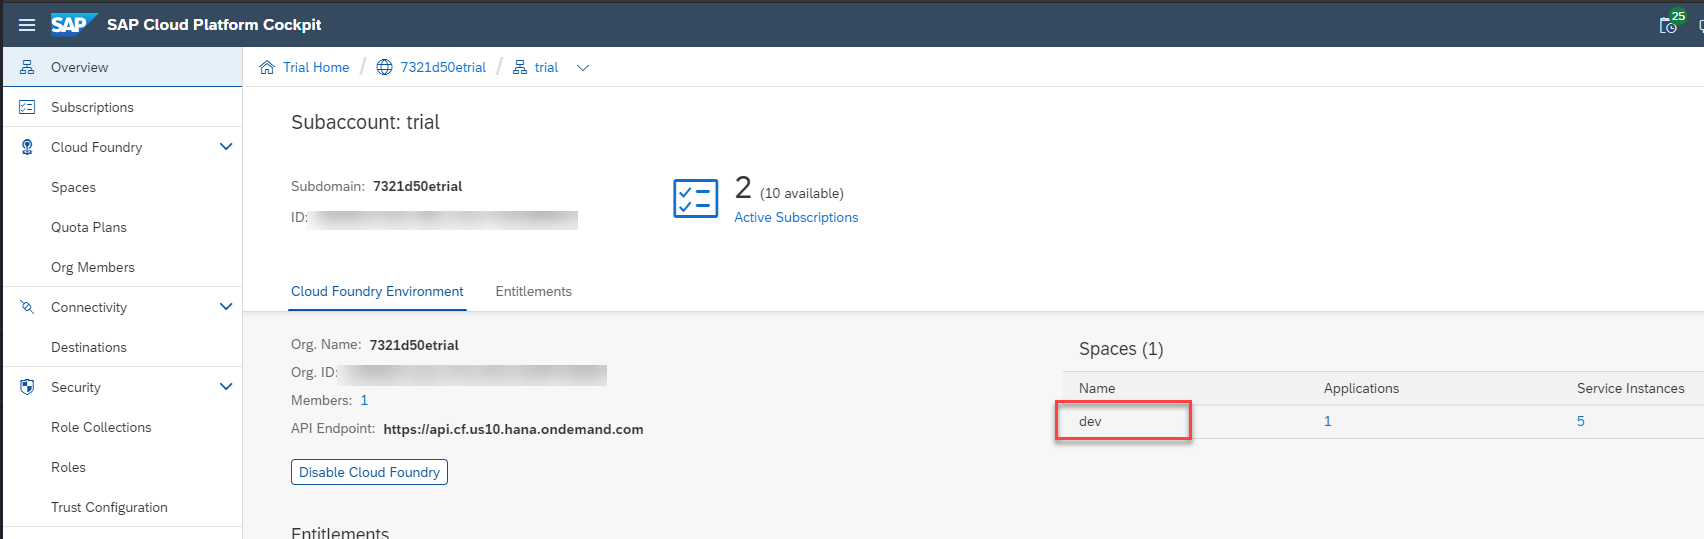
If successful, the next input will ask you for your Organization. In most situations you will have a single choice. But like the API endpoint earlier, if you need to confirm the correct value it will be displayed in the top navigation of the SAP BTP cockpit
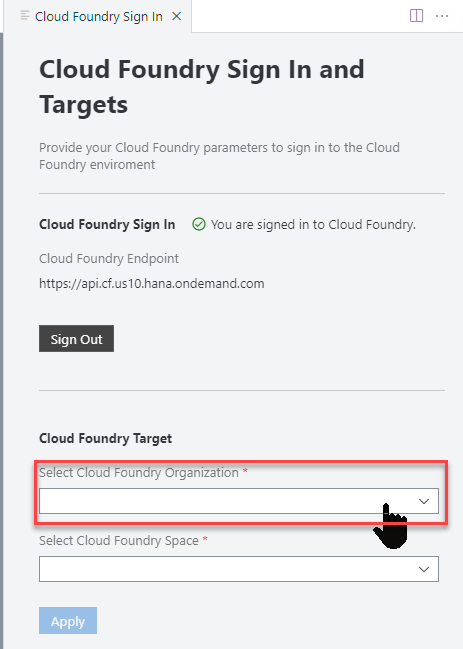
The final input will ask you for your Space. Press Apply.
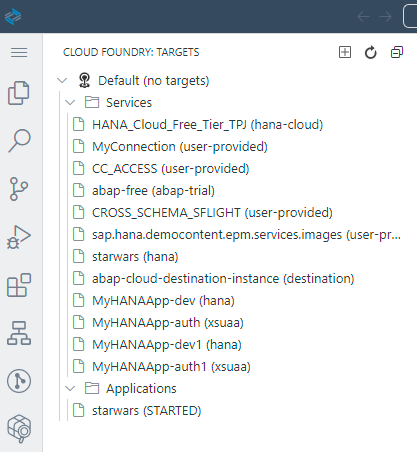
Upon completion of all the inputs, you should see that the Organization and Space have been set and you will see any service instances or application instances from the target space. It's normal to see less options in this tree display than the screenshot depending upon how much other development you might have already done in your BTP account.
Create a new project
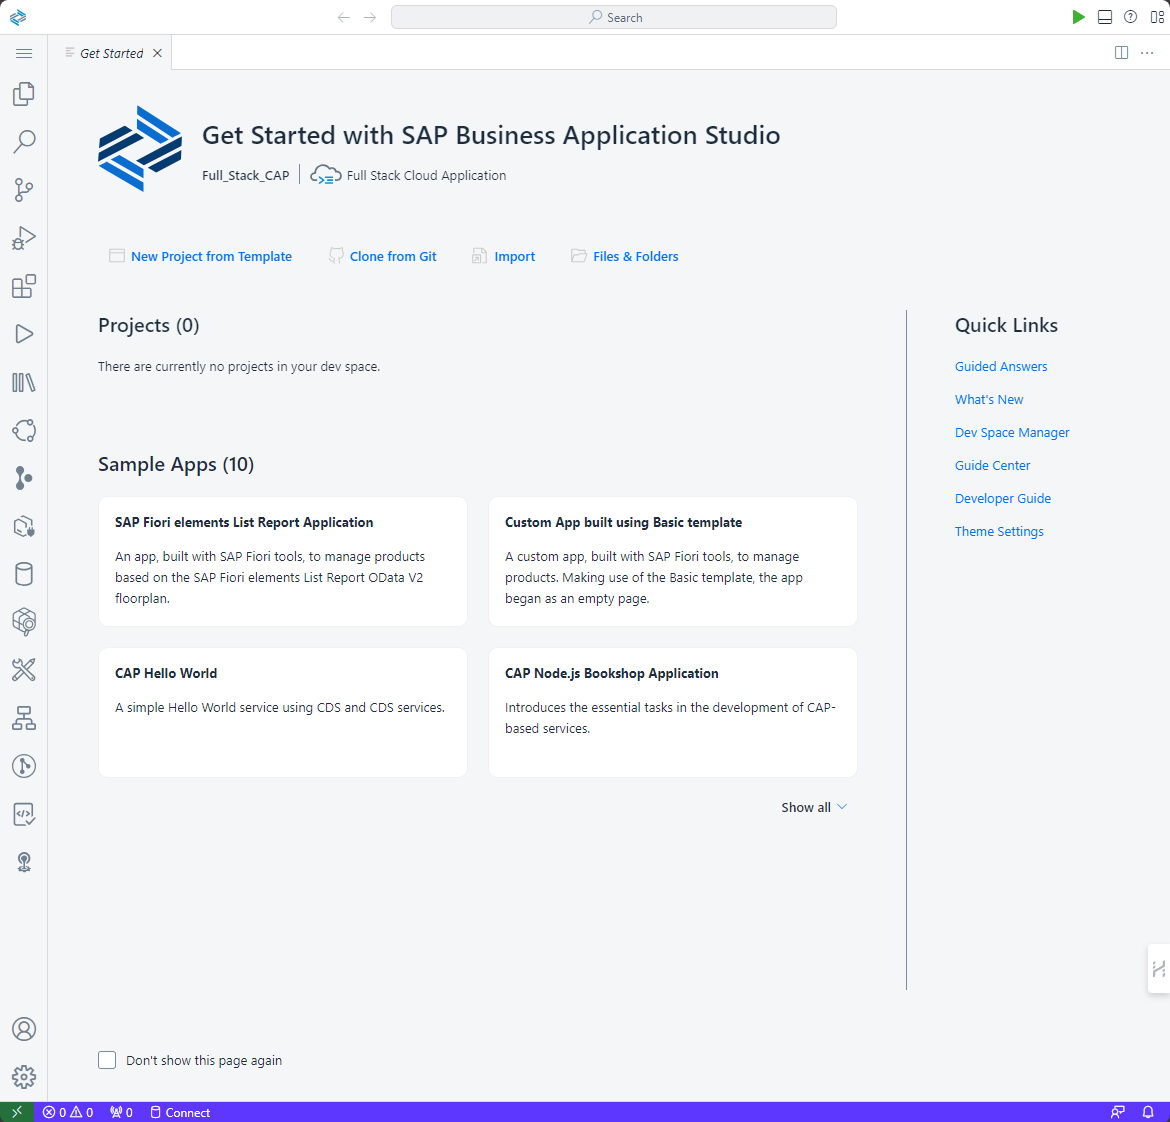
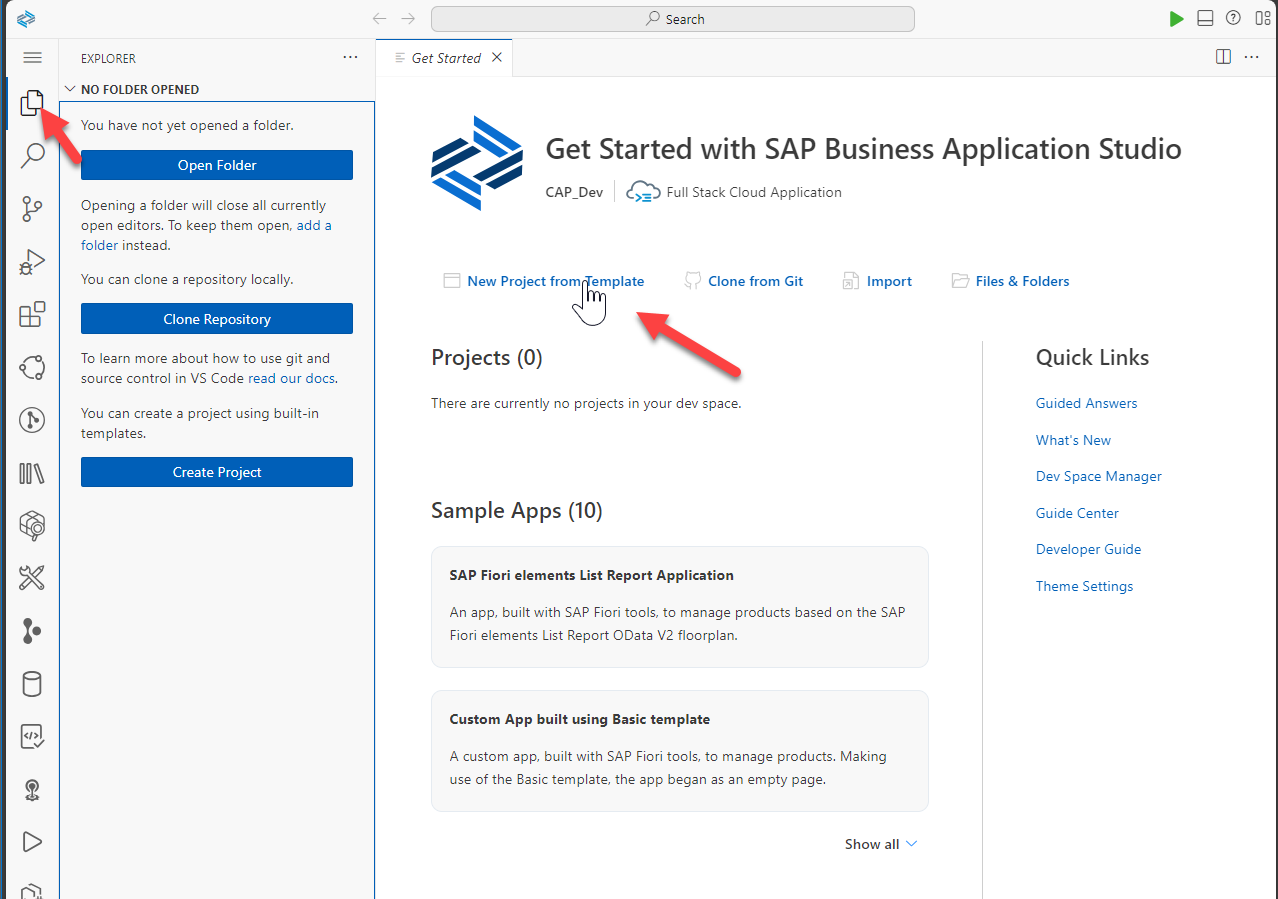
Return to the Explorer view. From the SAP Business Application Studio Welcome tab, click New Project from Template.
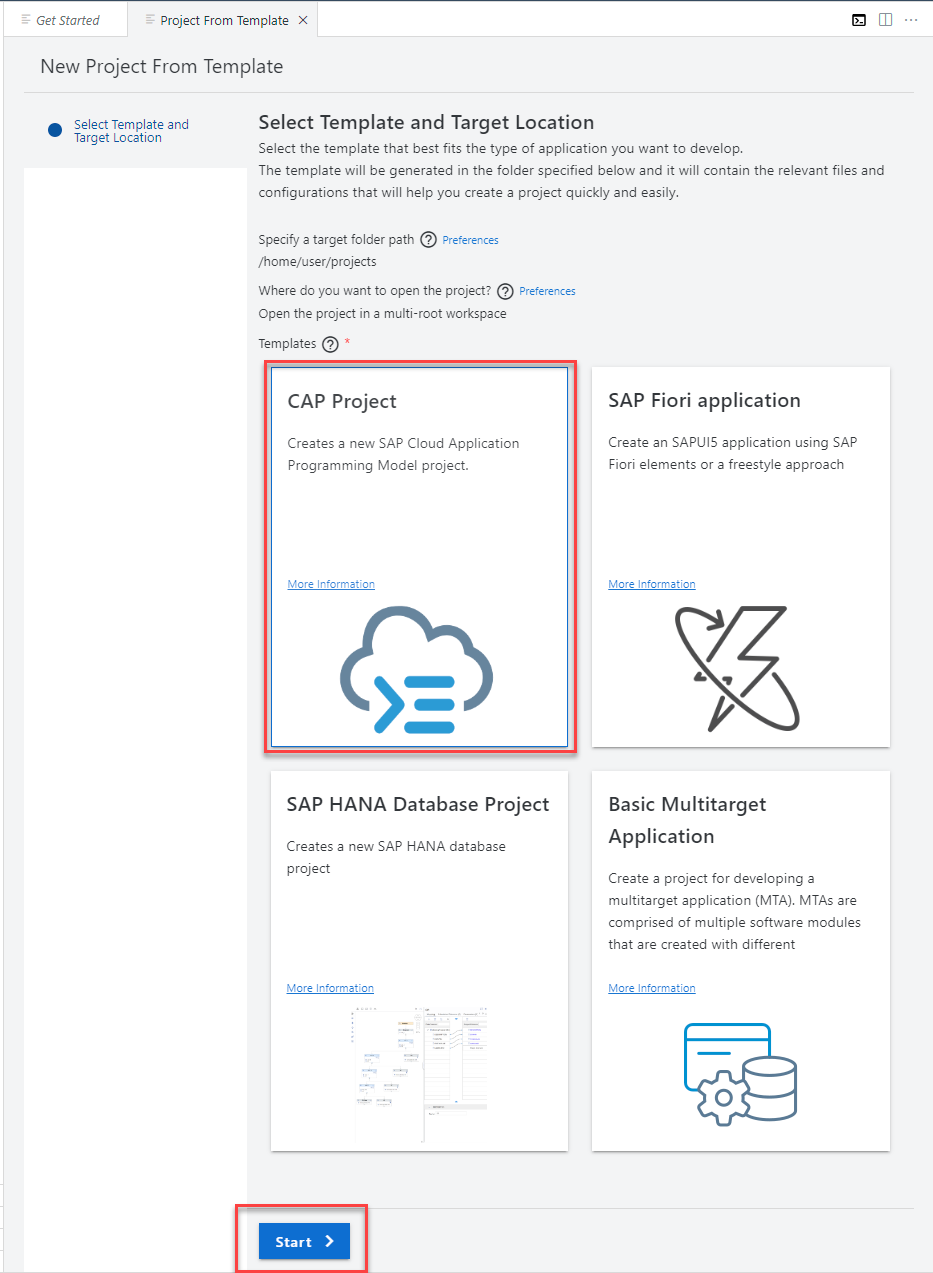
Choose CAP Project and click Start
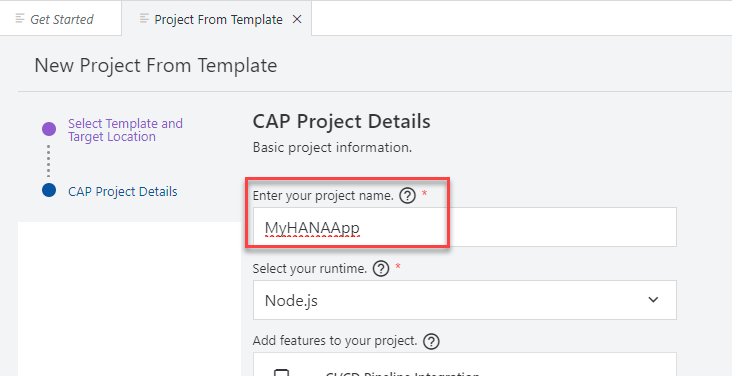
Use the following name for your project and click Next
NameMyHANAAppThis name will be used in different steps. It is recommended that you do not change it unless you remember to replace it in future tasks.
Choose
Node.jsas the runtime. SelectSAP HANA Cloudfrom the database for your application section. ChooseCloud Foundry:MTA DeploymentandCI/CD Pipeline Integrationunder which way to deploy your project. ChooseSAP BTP Authorization and Trust Management Service (XSUAA)andSAP Application Routerfrom the productive runtime capabilities for your application section. Press Finish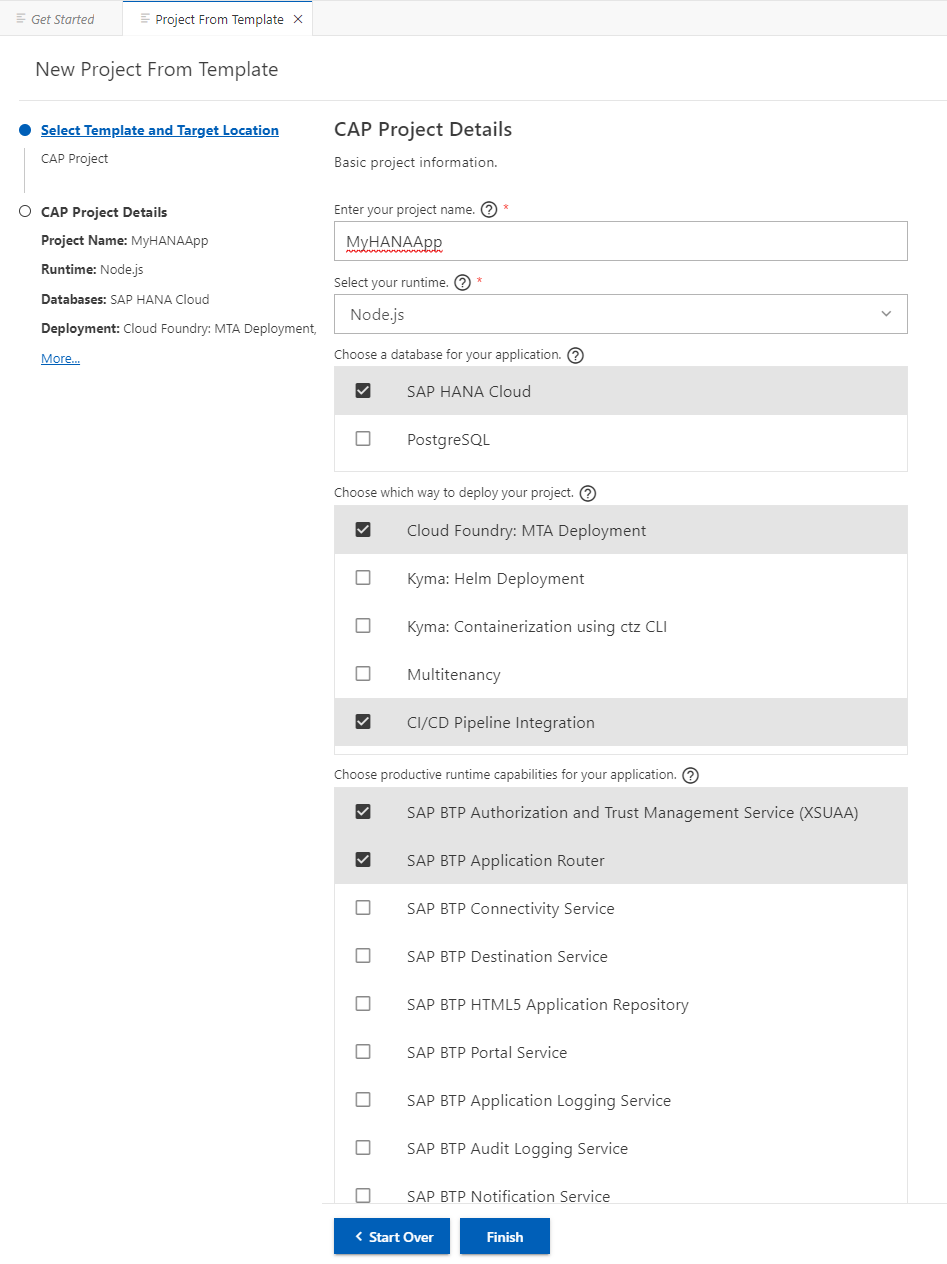
The new project should be added to your workspace automatically.
Explore the generated artifacts
The wizard has generated a Multi-target Application with two modules: a database module and a service module. Expand them to familiarize yourself with the basic folder structure.
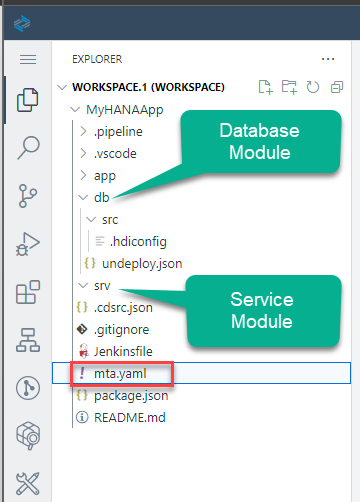
The wizard has also populated the
mta.yamlconfiguration file with the necessary dependencies and parameters for each module. Open it in the code editor by right mouse clicking on it and using the Open With menu option to explore it.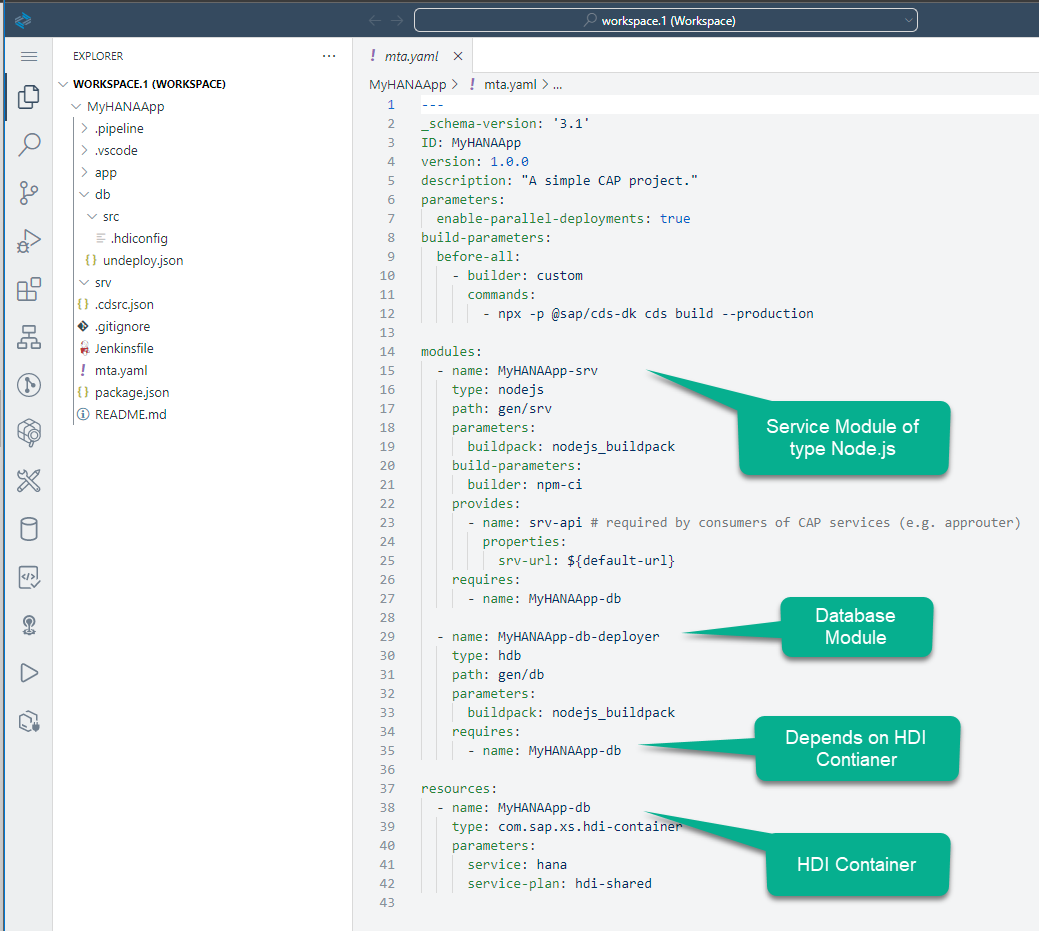
This file is the deployment descriptor and it is the glue that keeps all the micro-services together as a single application throughout its lifecycle. It declares the modules (applications or micro-services) and their dependencies with other micro-services or backing services. You can also use this file to inject variables into the environment variable
VCAP_SERVICESof your application.This file is very sensitive to indentation and does not allow for tabs.
Install dependencies
We are using several dependent Node.js modules in our project. They are referenced in the dependencies section of the package.json file we were just editing. These dependencies need to be installed into your project before we can do any testing.
Open a new terminal
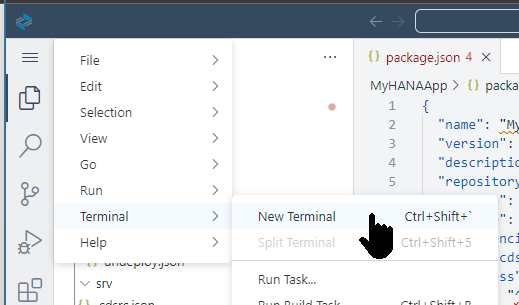
The terminal will open in the bottom right of the Business Application Studio
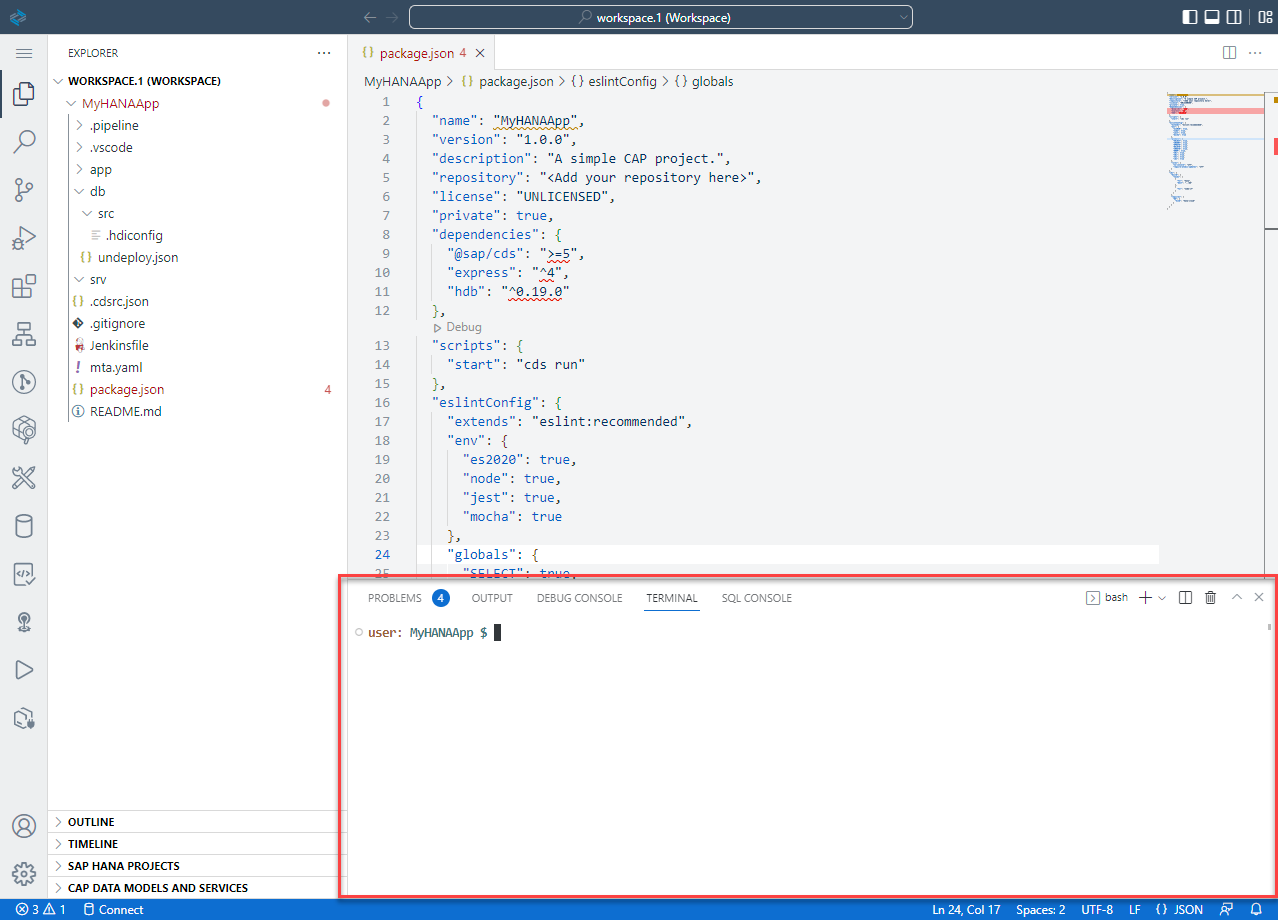
From the terminal run the command
npm installshellnpm install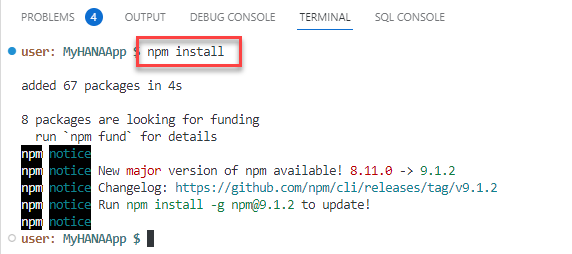
We will use an open source sample utility called hana-cli to help with development tasks. From this same terminal window run the command
npm install -g hana-cliin order to install it for later usage.shellnpm install -g hana-cli
Initialize local Git repository
You will use the local Git repository for basic version management.
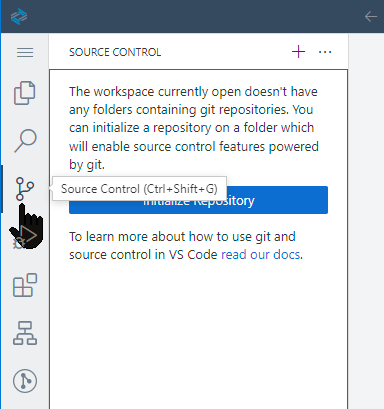
Click on the Source Control icon
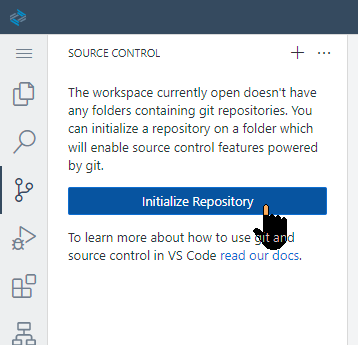
Click on the Initialize Repository icon
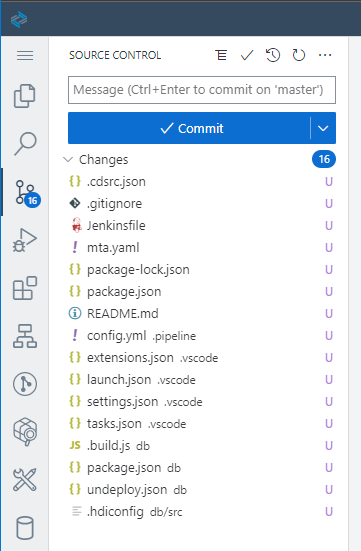
The Source Control panel now shows that it is being managed by Git and changes are being tracked
Perform your first commit
Each time you commit to the local or remote repository, you create a version. This will allow you to revert and compare any changes. It is recommended that you perform commits at the end of each tutorial.
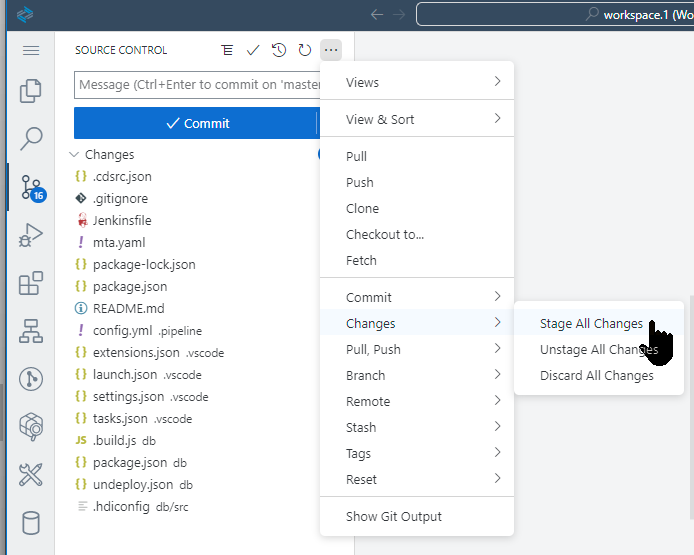
Choose Changes -> Stage All Changes to include all the new or changed files in this commits
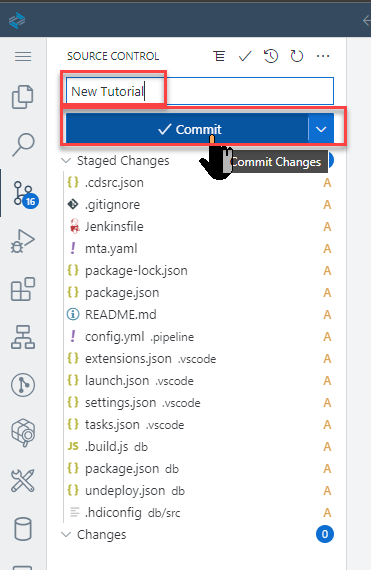
Add a commit message and click Commit All (Signed Off):
For a real project it is recommended to set a remote repository, for example GitHub. This will allow you to have a copy of your code outside the SAP Business Application Studio Dev Space.
What the wizard creates: After running the wizard, your project contains a
db/folder for your data model, asrv/folder for your service definitions, anapp/folder for any UI content, and apackage.jsonthat already includes@sap/cds,@sap/hdi-deploy, and other SAP-specific dependencies.
Exercise 2.2 Log In to Cloud Foundry
Before you can deploy or bind an HDI container, the Cloud Foundry CLI in BAS needs to know which Cloud Foundry organization and space to use.
👉 In BAS, open the command palette and run CF: Login to Cloud Foundry. Select your API endpoint, provide your credentials, and select the org and space where your HANA Cloud instance is mapped.
Why Cloud Foundry? SAP HANA Cloud instances are provisioned in a "multi-environment" context — the database itself is not running inside Cloud Foundry — but HDI containers are still created and managed as Cloud Foundry service instances (using the
hanaservice with thehdi-sharedplan). Logging in lets the CAP tooling find and bind those containers later.
Exercise 2.3 Initialize a Git Repository
Version control is important from day one. The tutorial has you initialize a local Git repository so you can track every change you make as you progress through the exercises.
👉 Follow the Git initialization steps in the tutorial. Stage and commit your initial project files once the wizard finishes.
Local vs. remote: A local Git repository gives you commit history and the ability to revert changes, but the code only lives on your BAS dev space. In a real project you would push to a central repository (GitHub, GitLab, Azure DevOps, etc.) for backup, collaboration, and CI/CD integration.
Summary
At the end of this exercise you have:
- A CAP Node.js project scaffolded and configured for SAP HANA Cloud
- A
package.jsonwith the correct SAP dependencies (@sap/cds,@sap/hdi-deploy, etc.) - An
mta.yamldeployment descriptor ready for Cloud Foundry MTA builds - A Cloud Foundry CLI session pointed at the correct org and space
- A local Git repository with an initial commit
Questions for Discussion
What is the value of the dev space in SAP Business Application Studio? To help with this discussion point consider the prerequisites section for not using SAP Business Application Studio.
Answer
A dev space is a pre-configured, containerized development environment in BAS tailored to a specific scenario — such as Full Stack Cloud Application, SAP Fiori, or SAP HANA Native. It ships with the correct extensions, CLI tools (`@sap/cds-dk`, Cloud Foundry CLI, MTA Build Tool), and runtimes already installed, so you can start coding immediately without any local setup.The trade-off versus a local environment like VS Code is that BAS requires an internet connection and runs inside SAP BTP, which can simplify connectivity to SAP services. SAP also provides a CDS language extension for VS Code for developers who prefer to work locally — see the prerequisites for details.
Why was it necessary to log in to Cloud Foundry, even though SAP HANA Cloud itself is not running inside Cloud Foundry?
Answer
SAP HANA Cloud is provisioned in a multi-environment context — the database is not tied to Cloud Foundry — but **HDI containers** (the isolated schemas where your database artifacts live) are still created and managed as Cloud Foundry service instances using the `hana` service with the `hdi-shared` plan.When you run
cds deployor build the MTA, the CAP tooling uses your Cloud Foundry session to discover, create, or bind to the correct HDI container in the target space. Without a CF login, the tooling cannot locate or provision the container. See HDI containers for more detail.What is the purpose of the
mta.yamlfile?Answer
`mta.yaml` is the deployment descriptor for a **Multi-Target Application (MTA)** — a bundle that groups multiple deployable components (a database module, a CAP service module, a UI app, an AppRouter, etc.) into a single archive that can be deployed atomically to Cloud Foundry.In this project the
mta.yamldefines:- A db module (
MyHANAApp-db) that runs@sap/hdi-deployto push database artifacts into the HDI container - A srv module (
MyHANAApp-srv) that runs the CAP Node.js service and exposes thesrv-apidestination - Resources for the HANA HDI container and (later) XSUAA, which Cloud Foundry provisions as service instances
See the MTA specification for the full descriptor reference.
- A db module (
Who can explain what NPM is and how it is used in this project?
Answer
NPM (Node Package Manager) is the standard package manager for Node.js. It reads `package.json` to install the libraries your project depends on and makes them available in `node_modules/`.Key packages in this CAP project:
@sap/cds— the CAP runtime: processes CDS models, serves OData endpoints, handles database queries.@sap/cds-dk— the CAP development toolkit: provides thecdsCLI for building, running, and deploying projects.@sap/hdi-deploy— the HDI deployer: reads compiled HANA artifacts fromdb/src/gen/and deploys them into the HDI container during the MTA build.
Run
npm ci(notnpm install) in CI/CD or when you first clone a project — it installs exactly the versions listed inpackage-lock.jsonrather than resolving fresh versions, which ensures reproducible builds.Version control with Git — what is the impact of using a local Git repository as we did in this tutorial?
Answer
A local Git repository gives you a full commit history, the ability to branch and experiment, and the safety net of reverting to any previous state. Every `git commit` is a snapshot of your project at a point in time.The limitation is that a local repo only exists on your BAS dev space. If the dev space is deleted or your BTP trial expires, that history is gone. In a real project you would push to a central repository (GitHub, GitLab, Azure DevOps, etc.) for:
- Backup — the code survives beyond any single environment
- Collaboration — multiple developers can push and pull changes
- CI/CD — pipelines can trigger automatically on commits and run builds, tests, and deployments
For ABAP developers in the room: Git-based version control in CAP works similarly to the abapGit / ABAP Development Tools (ADT) workflow you may already know, but operates at the file level rather than the transport level.
What is the difference between
npm installandnpm ci, and which should you use in a build pipeline?Answer
npm installresolves the dependency tree fresh frompackage.json, potentially installing newer minor or patch versions than the last run.npm ciinstalls exactly the versions locked inpackage-lock.json, deletesnode_modulesfirst if it already exists, and fails ifpackage-lock.jsonis missing or out of sync withpackage.json.In a build pipeline — including the
before-allhook inmta.yaml—npm ciis always preferred because it guarantees reproducible builds: every run installs exactly the same versions regardless of when the build runs or what has been published to the npm registry sincepackage-lock.jsonwas last updated.Use
npm installwhen you are intentionally updating dependencies and want npm to resolve fresh versions. Usenpm cieverywhere else.Look at the generated
package.json. What does thecds.requires.dbsection tell CAP about which database to use?Answer
The
cds.requires.dbblock is CAP's database configuration. By default the wizard generates something like:json"cds": { "requires": { "db": { "kind": "sql" }, "[production]": { "db": { "kind": "hana" } } } }"kind": "sql"tells CAP to use SQLite for local development — no HANA connection needed to runcds watchon your laptop. The"[production]"profile overrides this to"kind": "hana"when CAP is started with--profile production(whichcds build --productionactivates).At runtime on BTP, CAP reads the HDI container credentials from
VCAP_SERVICESusing thedbkey as the lookup name, so the service binding inmta.yamlmust be named to match. This single block controls both the local development database and the production HANA connection.
Further Study
- Video Version of this Tutorial
- SAP Business Application Studio
- SAP HDI Containers
- HANA Cloud: HDI — Under the Hood
- CAP — Getting Started
- MTA Deployment Descriptor Reference
- Git basics in 10 minutes
Next
Continue to 👉 Exercise 3 - Create Database Artifacts Using Core Data Services (CDS) for SAP HANA Cloud